This guide is provided by Conductor, the service that powers the QuickBooks
Desktop integration for many business tools, including the one that sent you
here.
1
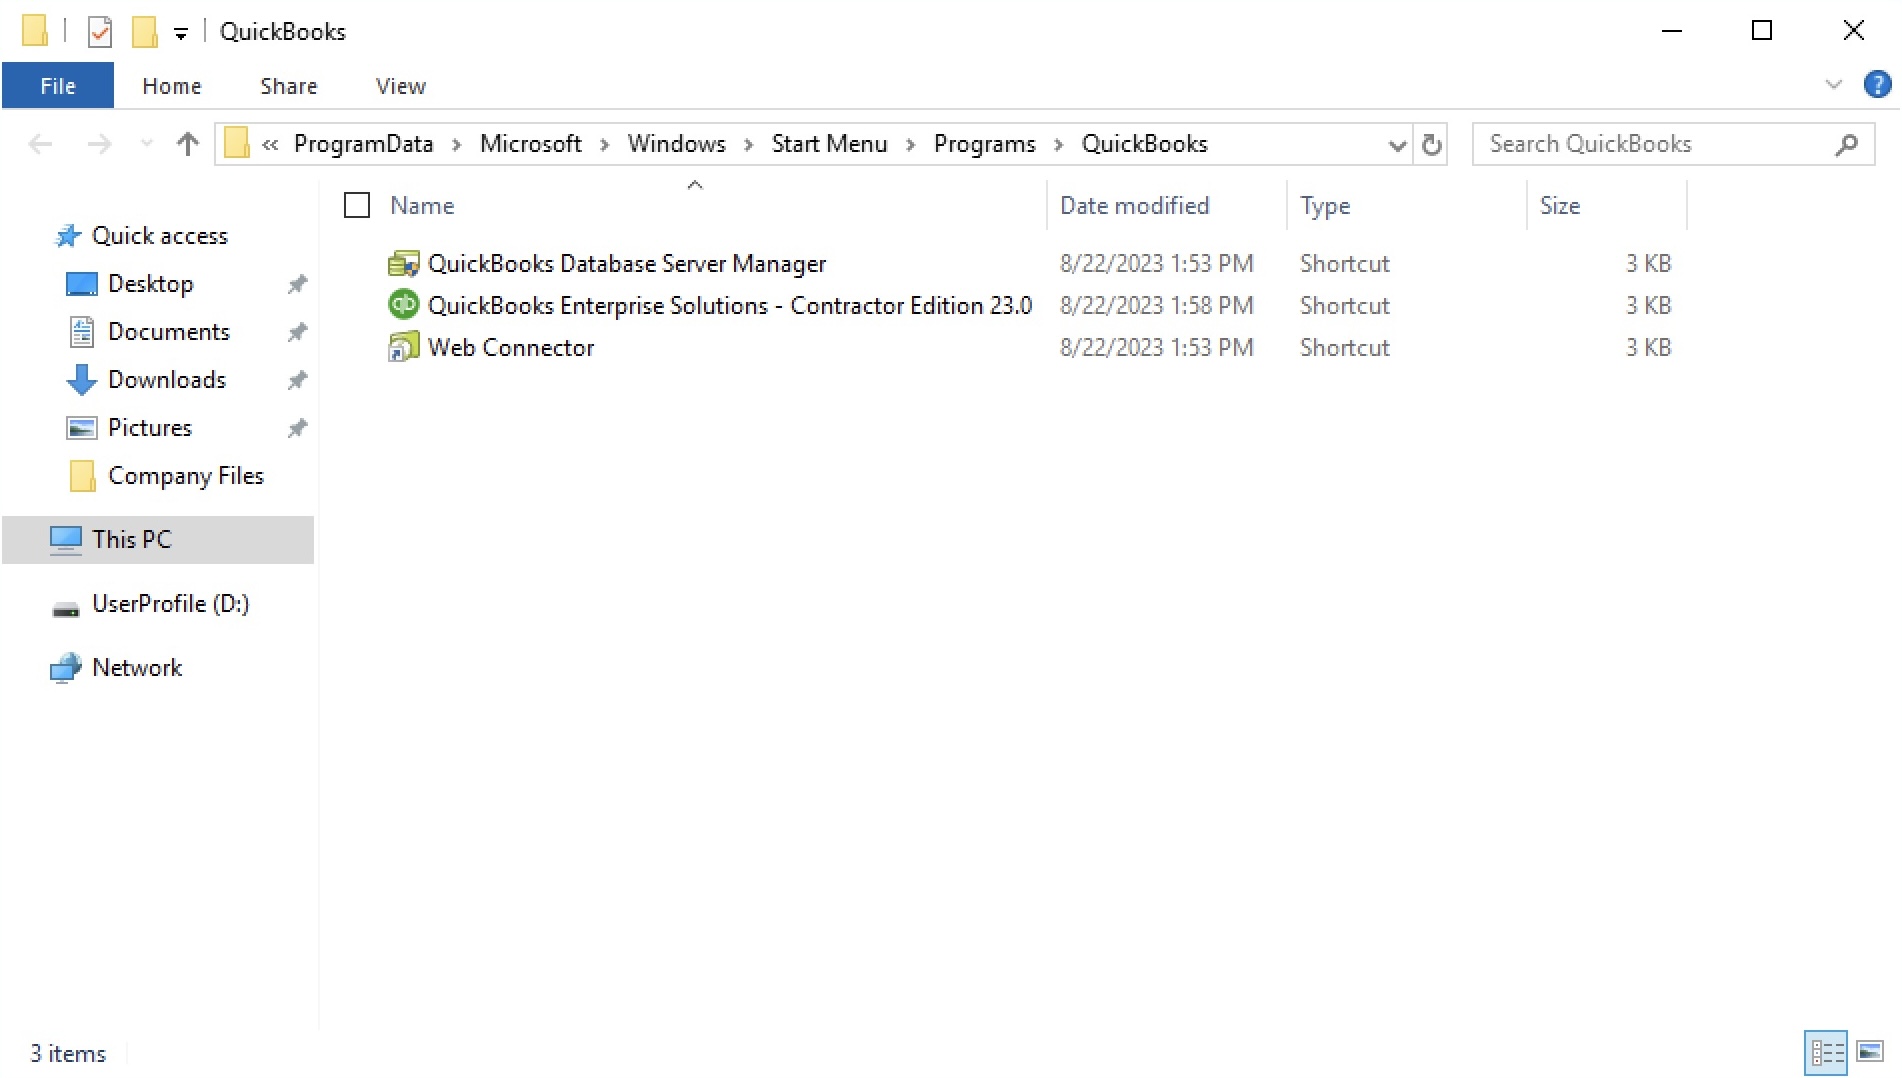
Open the QuickBooks Desktop shortcut location
- Click the Windows Start button and type “QuickBooks Desktop” in the search box.
- In the search results, right-click the QuickBooks Desktop app and select Open file location. This opens the folder that contains the shortcut Windows uses to launch QuickBooks Desktop.
2
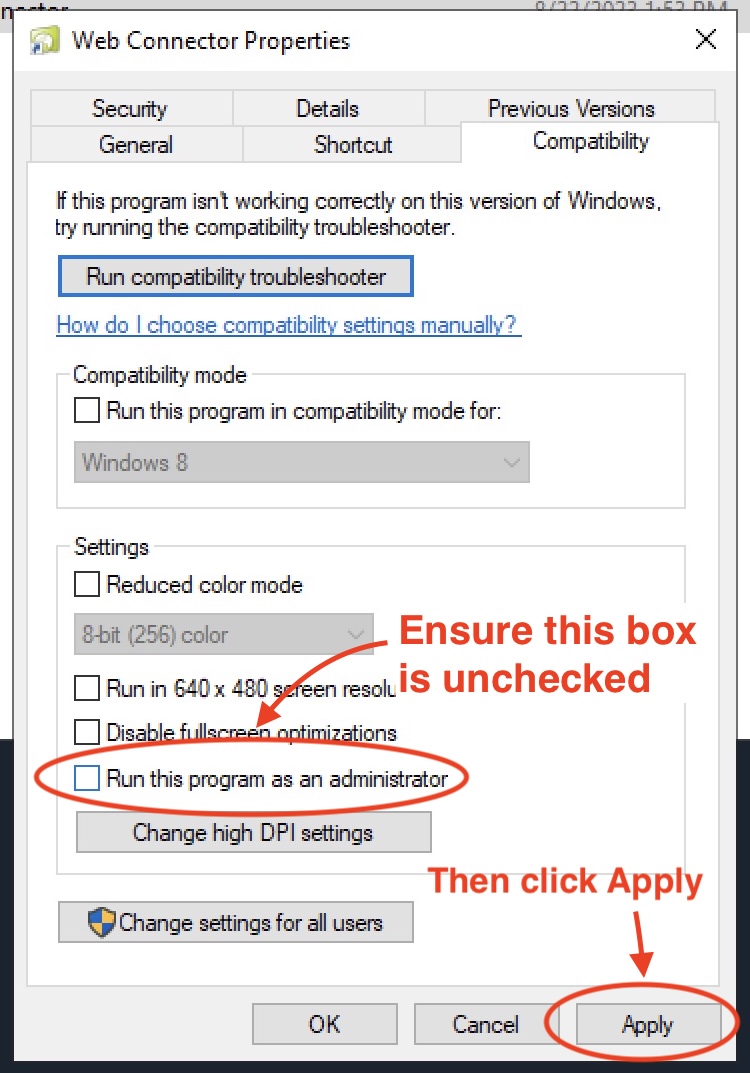
Disable ‘Run as administrator’ for QuickBooks Desktop
- In the folder that appears, right-click the QuickBooks Desktop shortcut and choose Properties.
- Select the Compatibility tab.
- Near the bottom of the window, ensure the box for “Run this program as an administrator” is unchecked.
- Click Apply, then OK to save the change.
3
Open the QuickBooks Web Connector shortcut location
- Click the Windows Start button and type “Web Connector” in the search box.
- In the search results, right-click the QuickBooks Web Connector app and select Open file location.
This will likely be the same folder as the QuickBooks Desktop shortcut from the previous step.
4
Disable ‘Run as administrator’ for the Web Connector
Repeat the same steps you performed for QuickBooks Desktop:
- Right-click the QuickBooks Web Connector shortcut and choose Properties.
- Select the Compatibility tab.
- Ensure “Run this program as an administrator” is unchecked.
- Click Apply, then OK.
5
Close QuickBooks Desktop and the Web Connector
- Exit QuickBooks Desktop by clicking File → Exit to close the program completely.
-
Exit the Web Connector - either approach below will work:
- In the Web Connector window, click Exit. If a confirmation dialog appears, click OK.
- Or, open Task Manager, locate QBWebConnector.exe, and click End task.
6
REQUIRED: Recreate the Web Connector log file
After closing QuickBooks Desktop and the Web Connector, you must complete this guide to delete the Web Connector log file and auto-generate a new one. This resolves a permissions-related issue that occurs after changing permission settings.
7
Open QuickBooks Desktop and the Web Connector again
After deleting the log file, re-open QuickBooks Desktop and the Web Connector:
- Launch QuickBooks Desktop as you would normally.
- In QuickBooks Desktop, click File → App Management → Update Web Services to open the Web Connector.
8
Stop the UAC pop-ups
Finally, we recommend completing this guide to stop the “Do you want to allow this app to make changes to your device?” prompts that can interrupt syncing. These pop-ups may start appearing after the recent permission change, which is why we recommend completing this step last.