This guide is provided by Conductor, the service that powers the QuickBooks
Desktop integration for many business tools, including the one that sent you
here.
1. Check if the Web Connector starts automatically when you start your computer
First, let’s check whether the Web Connector starts automatically when you start your computer:Restart your computer
Restart your computer so we can check in the next step whether the Web Connector automatically starts when your computer starts.
Check the Task Manager for the Web Connector
After your computer finishes booting up, the Web Connector should automatically start invisibly in the background. Let’s check if it is running:
- Open the Windows Task Manager by searching for “Task Manager” in the Windows search bar (usually located in the bottom-left corner of your screen).
- If you see a “More details” button in the bottom-left corner of the Task Manager window, click it to expand the Task Manager.
-
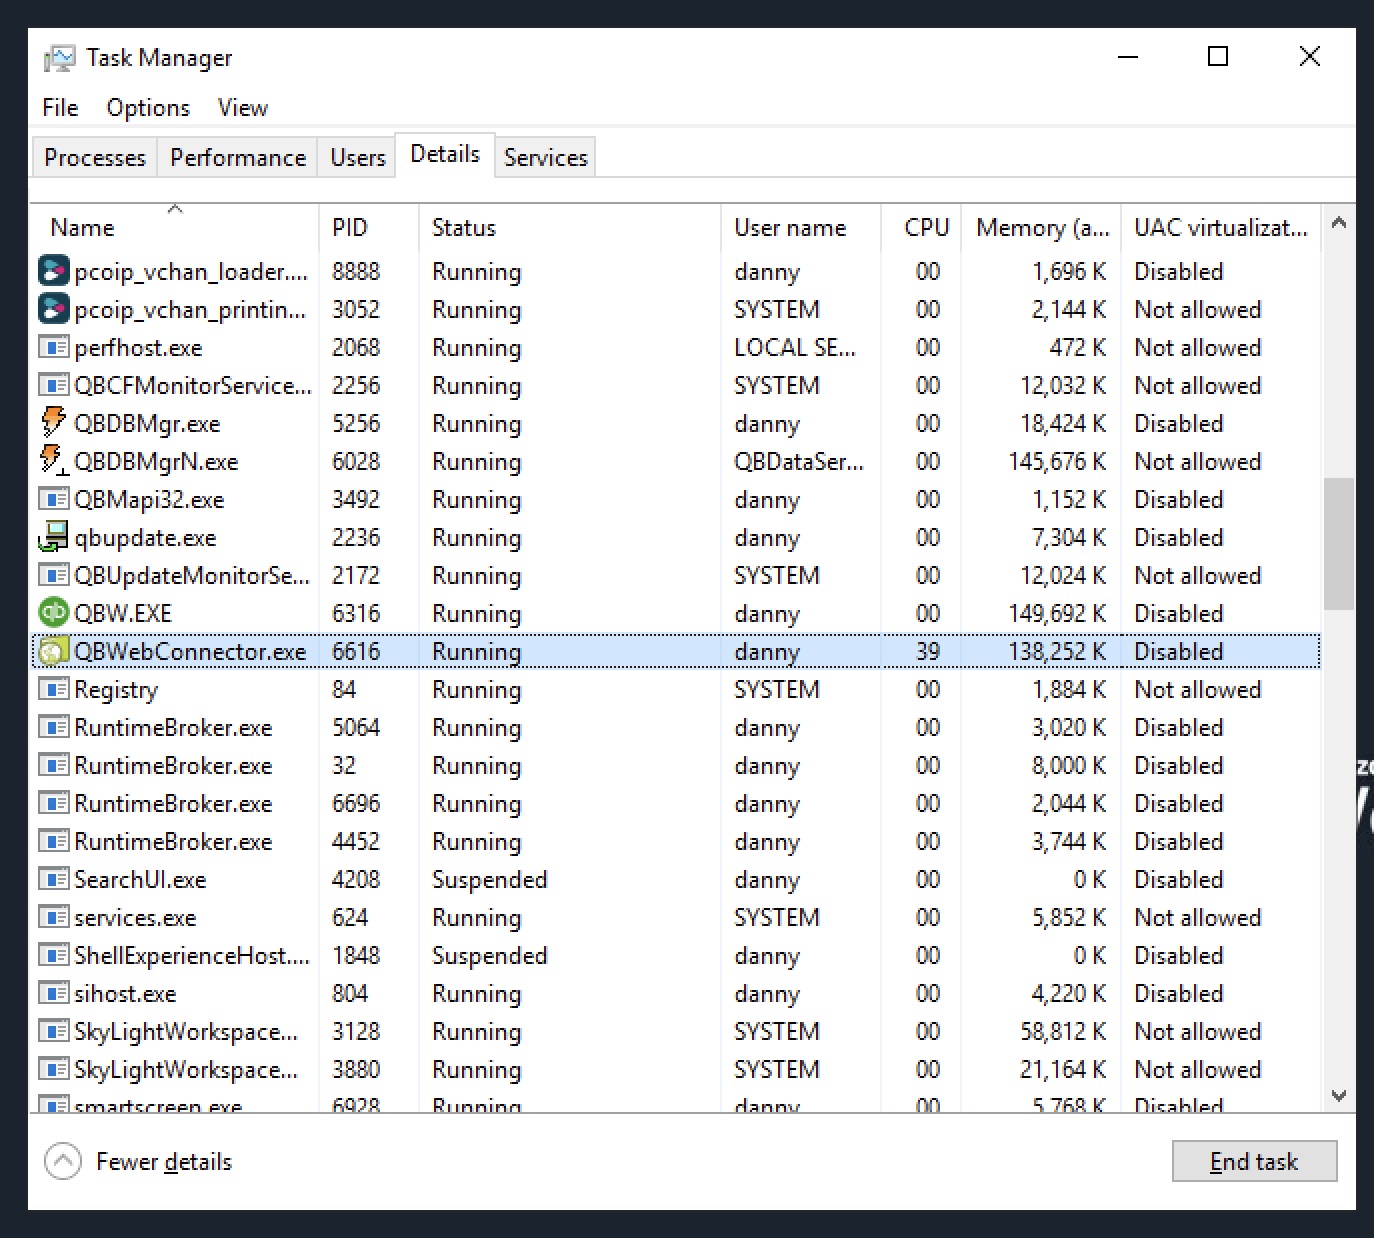
Navigate to the “Details” tab and scroll down until you see the “QBWebConnector.exe” process which should look like the screenshot below. If you see it, you can skip the rest of this guide. Otherwise, continue to the section below.
2. Add a Startup shortcut for the Web Connector to open automatically
Most Windows PCs will launch QuickBooks Web Connector at sign-in as long as a shortcut toQBWebConnector.exe lives in the system-wide Startup folder. Follow the steps below so QuickBooks Web Connector launches automatically each time Windows starts, and follow our QuickBooks Desktop guide to ensure it launches automatically after every reboot.
Sign in with a Windows administrator account
Make sure you are logged in to Windows with an account that has local administrator rights. If you are unsure, ask your IT team.
Open the Startup folder
Press
Win + R, type shell:startup, and press Enter. File Explorer opens to:C\\ProgramData\\Microsoft\\Windows\\Start Menu\\Programs\\StartupAnything you place here launches automatically whenever this computer starts.Locate QuickBooks Web Connector
Click Start, type “Web Connector”, then right-click the QuickBooks Web Connector search result and choose Open file location. In the window that opens, right-click the QuickBooks Web Connector shortcut again and choose Open file location so File Explorer jumps to the actual
QBWebConnector.exe program file.Create the startup shortcut
Right-click and hold
QBWebConnector.exe, drag it into the Startup folder you opened earlier, and release the mouse. Choose Create shortcuts here from the context menu to add a shortcut in the Startup folder.2. (Alternative) If the shortcut doesn’t work (above), create a Windows Task Scheduler task for the Web Connector to open automatically
If the Web Connector still fails to start on its own, you can instead use Windows Task Scheduler to launch it reliably on every boot.Open Windows Task Scheduler
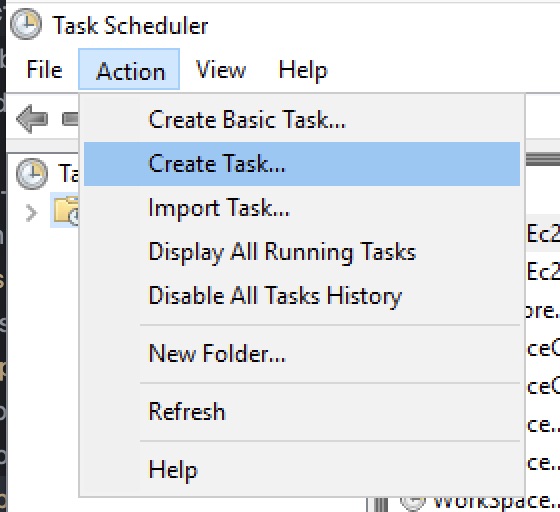
Open the Windows Task Scheduler by searching for “Task Scheduler” in the Windows search bar (usually located in the bottom-left corner of your screen).
General tab
In the “General” tab of the new task window: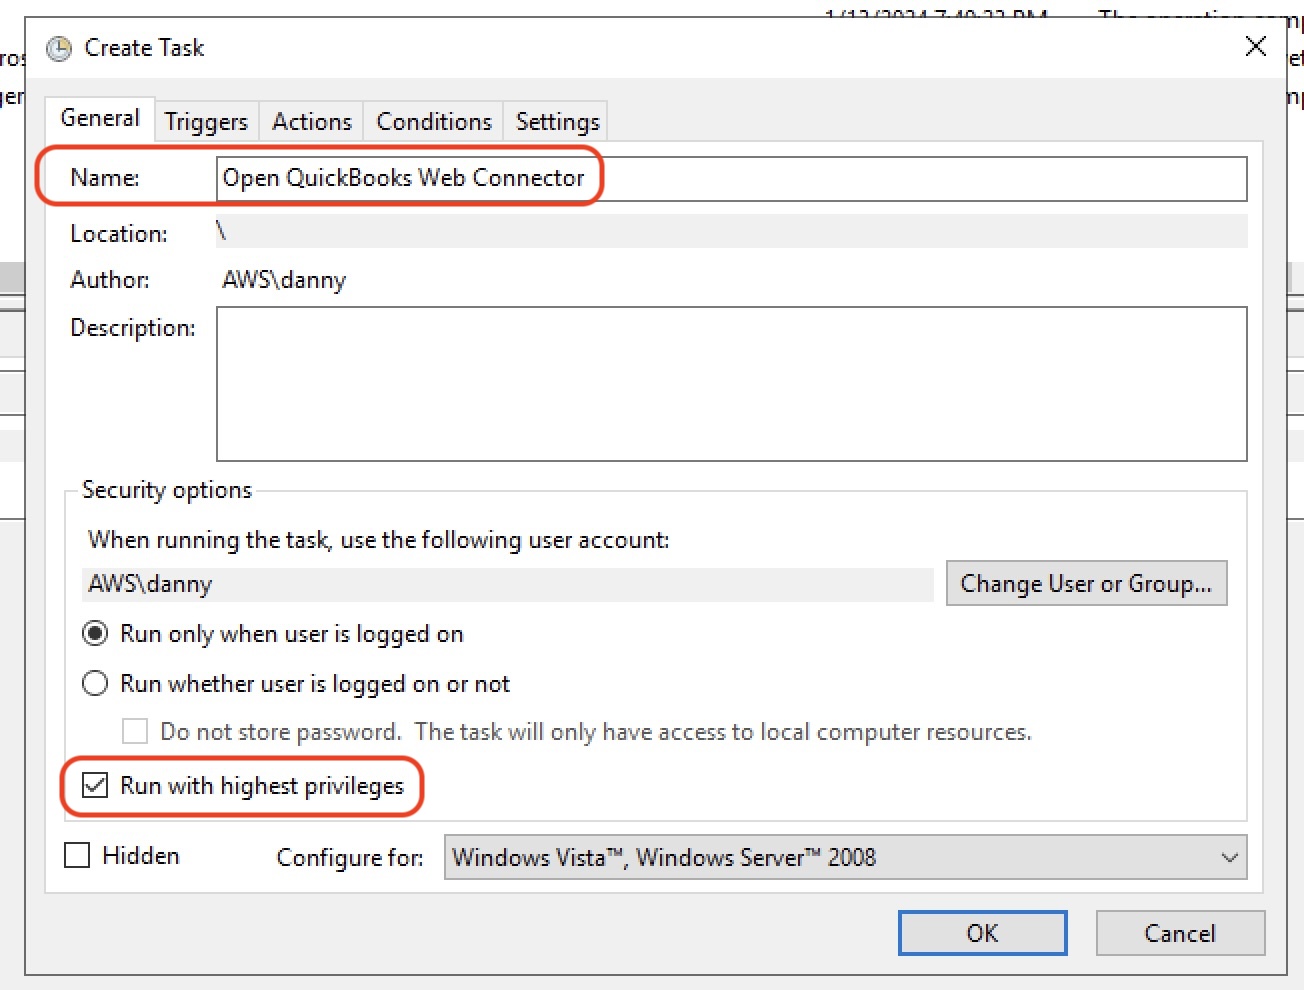
- Enter any name for your task, such as “Open QuickBooks Web Connector”.
- Check the option “Run with highest privileges” near the bottom to ensure the task runs with administrator rights.

Set trigger for startup
Go to the “Triggers” tab and click “New”.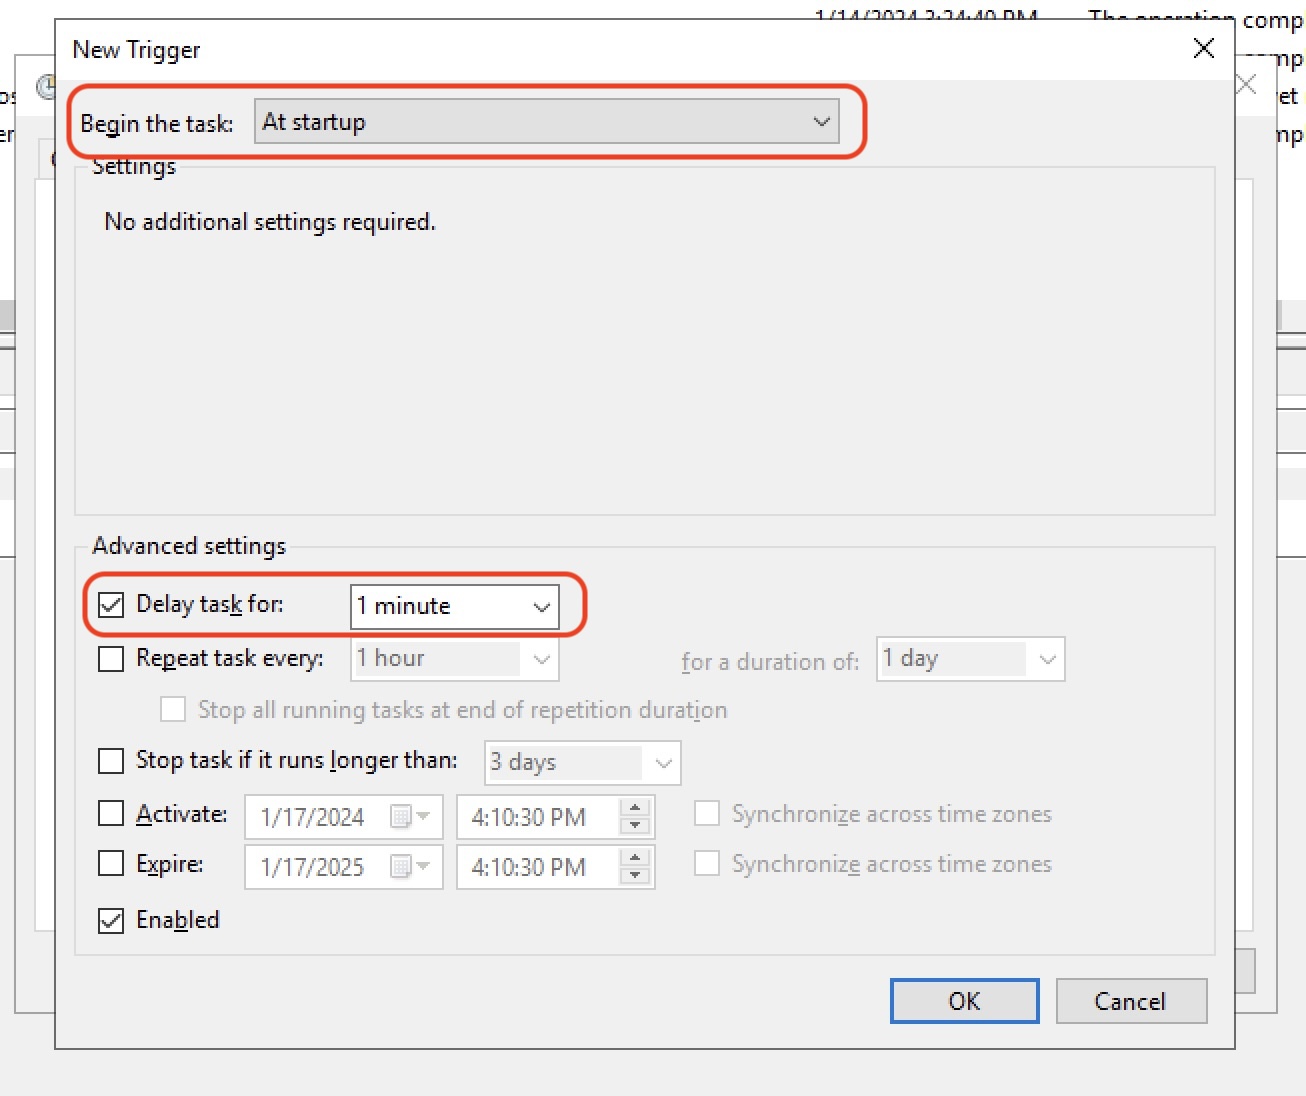
- Under “Begin the task”, select “At startup” from the dropdown menu.
- Set a delay for 1 minute by checking “Delay task for” and choose “1 minute”.

Get the file path for the Web Connector
-
Using Windows search (usually located in the bottom-left corner of your screen), type “Web Connector”, then right-click the QuickBooks Web Connector result (or press
Shift + F10) and select “Open file location”. - In the folder that opens, you should see a shortcut for the Web Connector. Right-click on the Web Connector icon and select “Properties” from the context menu to open the Properties window.
-
In the Properties window, as shown below, copy the file path in the “Target” field. You can do this by selecting the text and pressing
Ctrl + Con your keyboard. Then click “Cancel” to close the Properties window.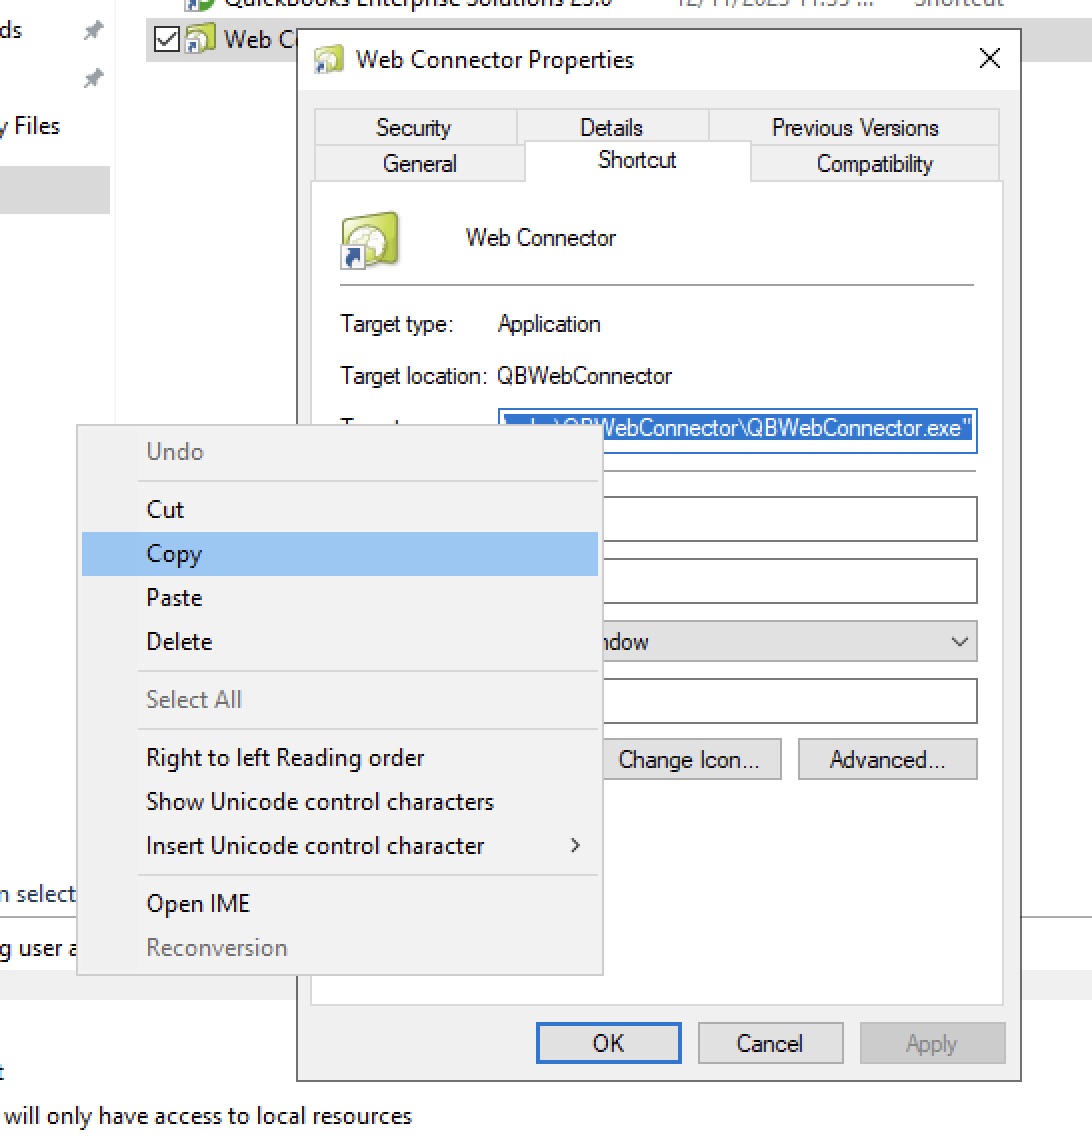
Set action to start QuickBooks Web Connector
Go back to the Task Scheduler window and go to the “Actions” tab. Click “New” and paste the file path you copied in the previous step into the “Program/script” field by right-clicking and selecting “Paste” from the context menu. Then click “OK”.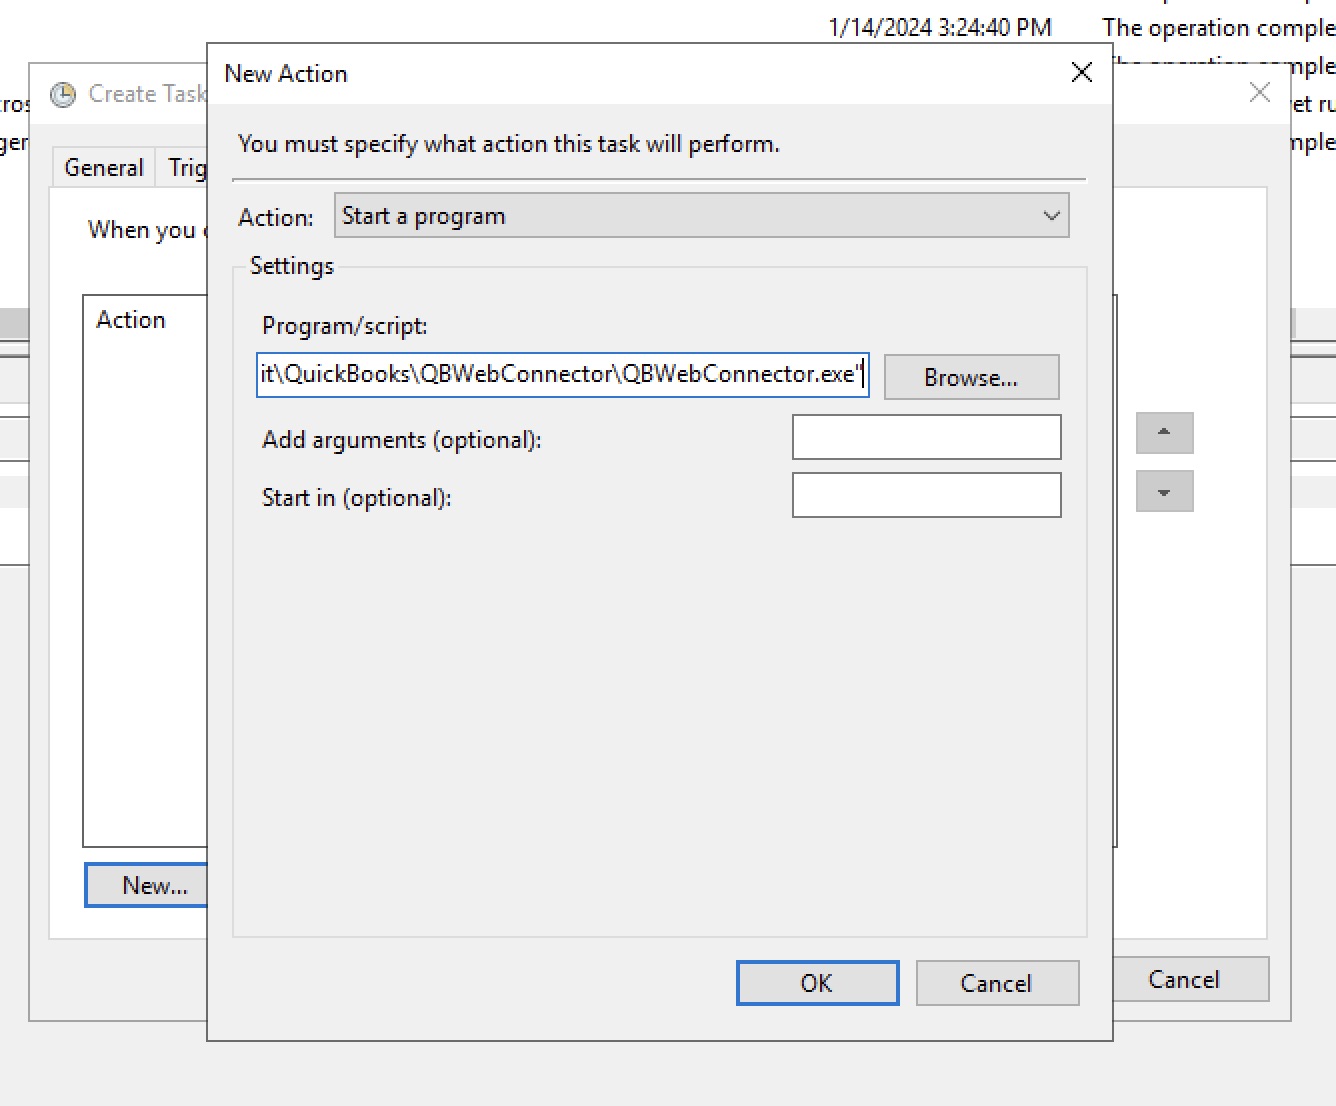

Configure settings to retry
In the “Settings” tab, check the option “If the task fails, restart every” and set the value to “1 minute” and the “Attempt to restart up to” value to “3 times”. Then click “OK”.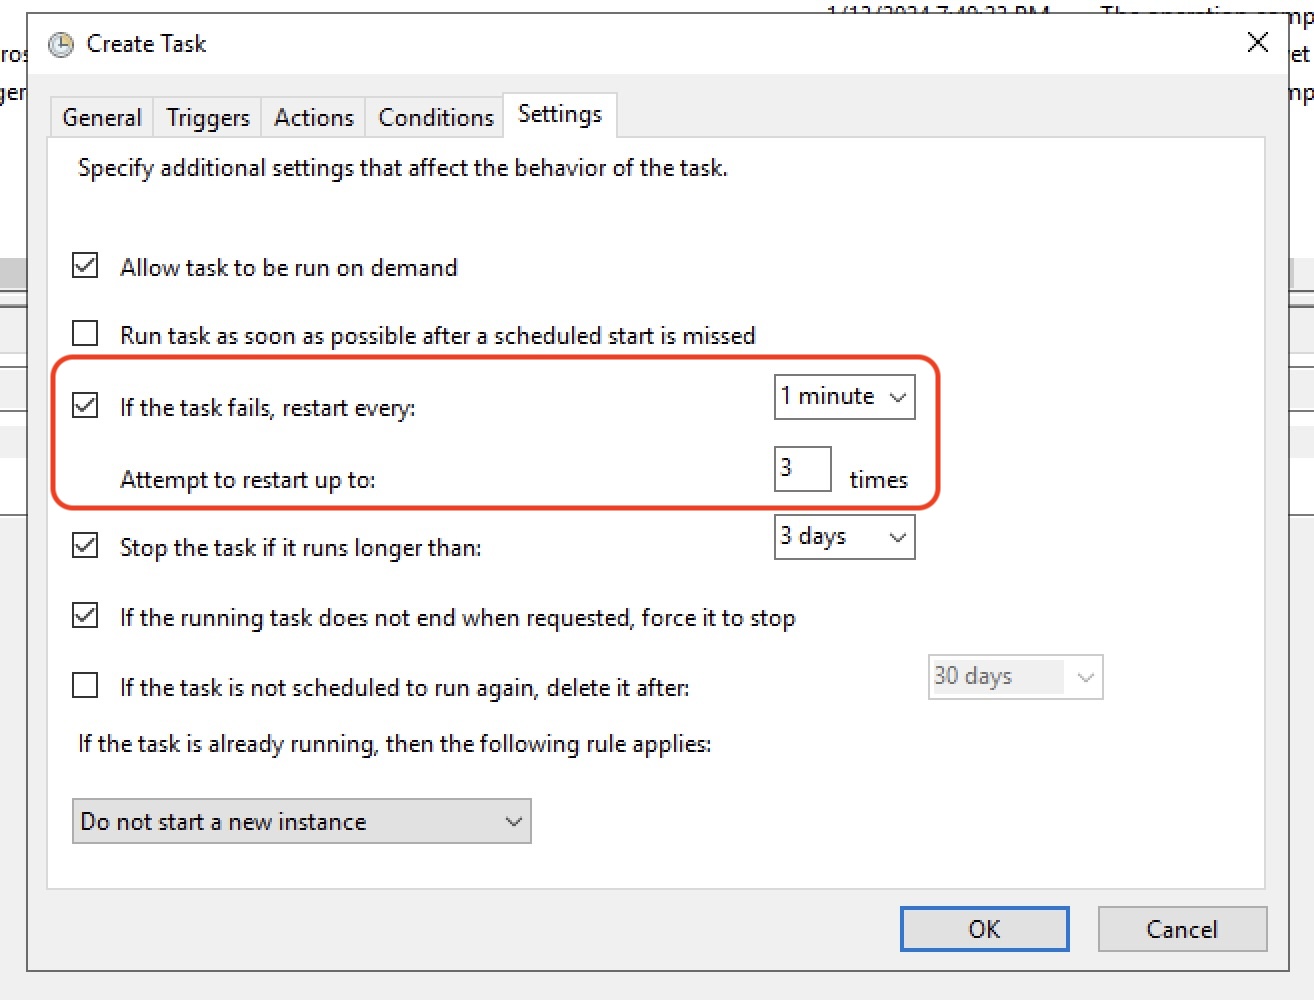

Save and exit
Click “OK” to save your new task. You might be prompted to enter an administrator password at this point.
Test the task
Finally, test your task by restarting your computer, waiting one minute, and confirming that the QuickBooks Web Connector opened automatically after startup using the same steps as in the first section of this guide.


