This guide is provided by Conductor, the service that powers the QuickBooks
Desktop integration for many business tools, including the one that sent you
here.
Switch to single-user mode
If you’re currently in multi-user mode, switch to single-user mode by going to “File” → “Switch to Single-user Mode” in the top menu bar.
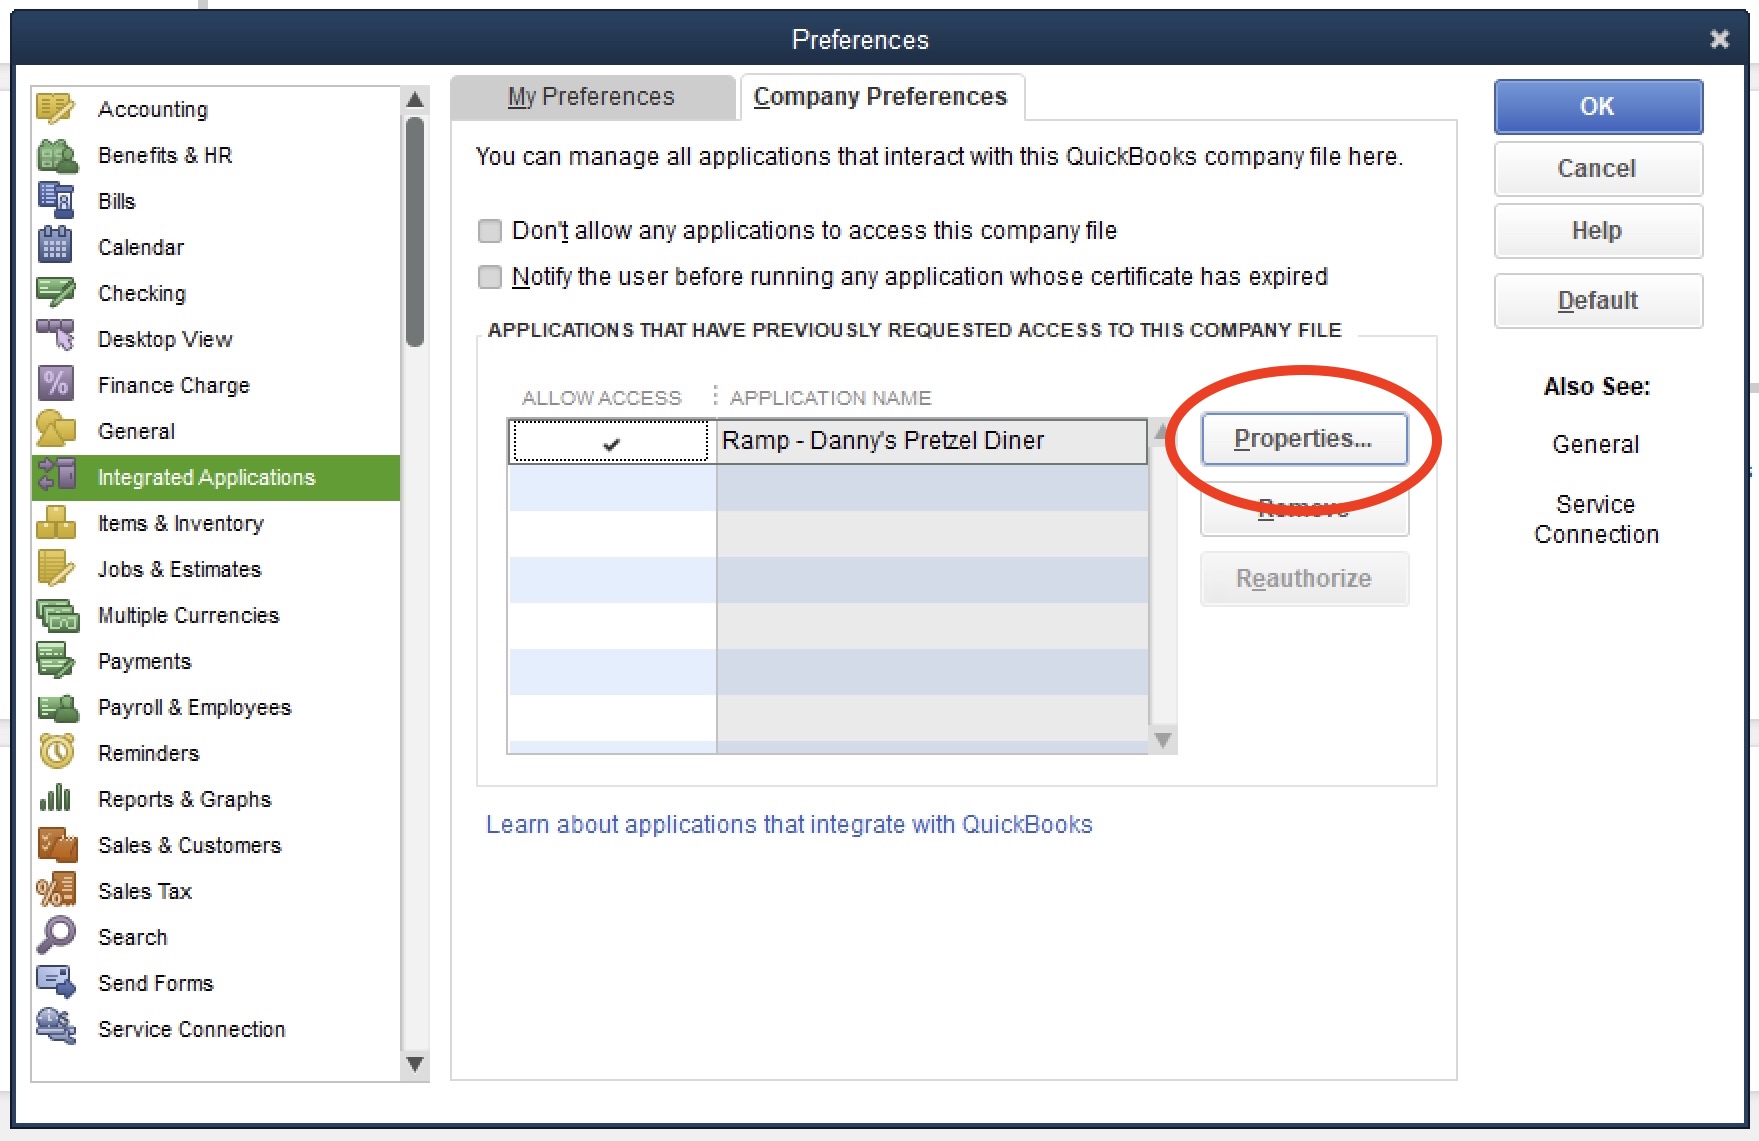
Open the Integrated Applications preferences
- Go to “Edit” → “Preferences” in the top menu bar.
- In the Preferences window that appears, navigate to “Integrated Applications” in the left sidebar.
- Click on the “Company Preferences” tab at the top of the window.
Open the connection's Properties window
- In the list of connections find the row that matches your Web Connector connection.
- Select it and click Properties.

Change the desired settings
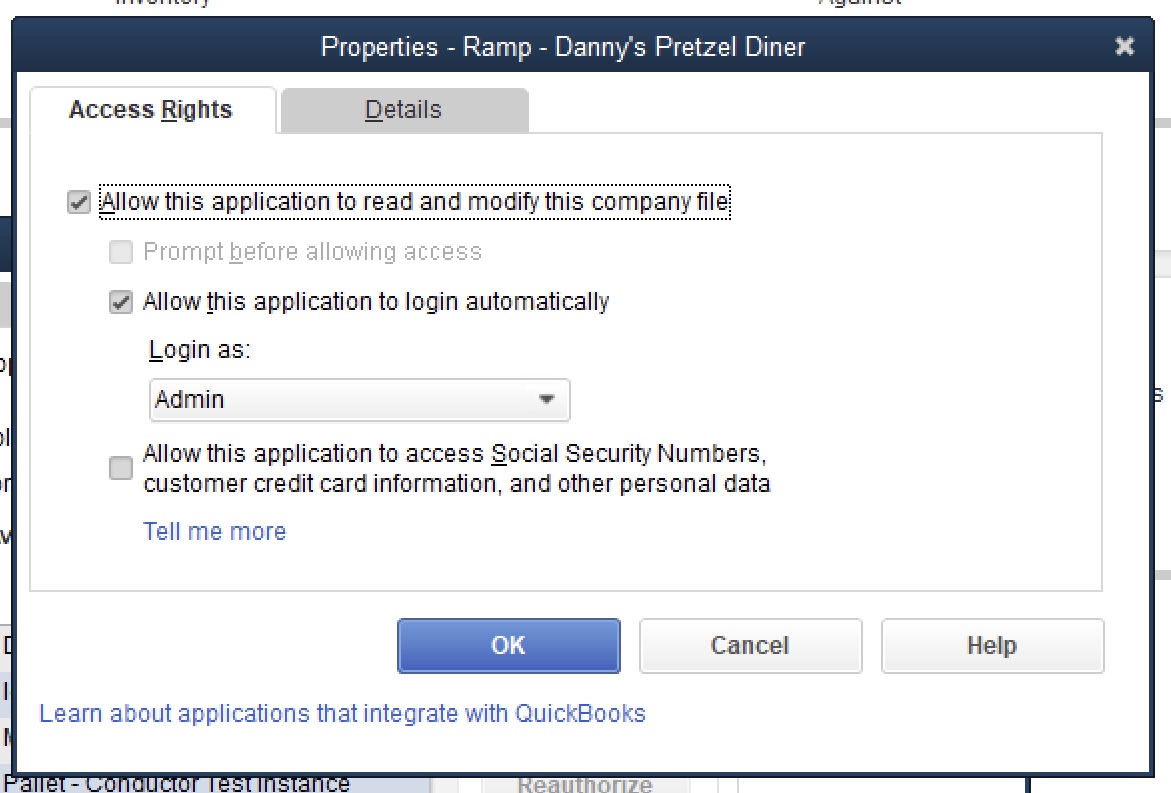
The connection Properties window is the same window you saw when you intiially added the Web Connector connection. Here you can adjust:
- Access rights – for unattended syncing we recommend selecting “Yes, always; allow access even when QuickBooks is not running”.
- Login as – choose which QuickBooks user the connection will use. (See Change the QuickBooks Desktop user for a connection for more details.)
- Personal data access – check or un-check “Allow this application to access personal data such as Social Security Numbers and customer credit card information” depending on your needs.
- Any other options provided by QuickBooks Desktop or your specific QuickBooks version.


