> ## Documentation Index
> Fetch the complete documentation index at: https://docs.conductor.is/llms.txt
> Use this file to discover all available pages before exploring further.
# Create a QuickBooks Desktop test instance
> Create your own QuickBooks Desktop test instance with an AWS WorkSpace.
export const Image = ({src, alt, width, align = "center", noShadow = false, noBorder = false, noZoom = false}) =>  ;
To develop and test integrations with Conductor, you need your own QuickBooks Desktop instance to send and receive data. This guide shows you how to set up a QuickBooks Desktop test environment by creating a virtual Windows instance and installing the QuickBooks Desktop free trial. Once set up, you can connect to this QuickBooks Desktop test instance from your local development environment via Conductor.
**Also important**: This guide may be outdated as AWS WorkSpaces.
Alternatively, check out [this
guide](https://chatgpt.com/share/67813957-e52c-8003-8776-be82b725215f) or
asking an LLM (like ChatGPT) for different approaches to setting up a Windows
instance with QuickBooks Desktop installed.
## 1. Set up a virtual Windows environment
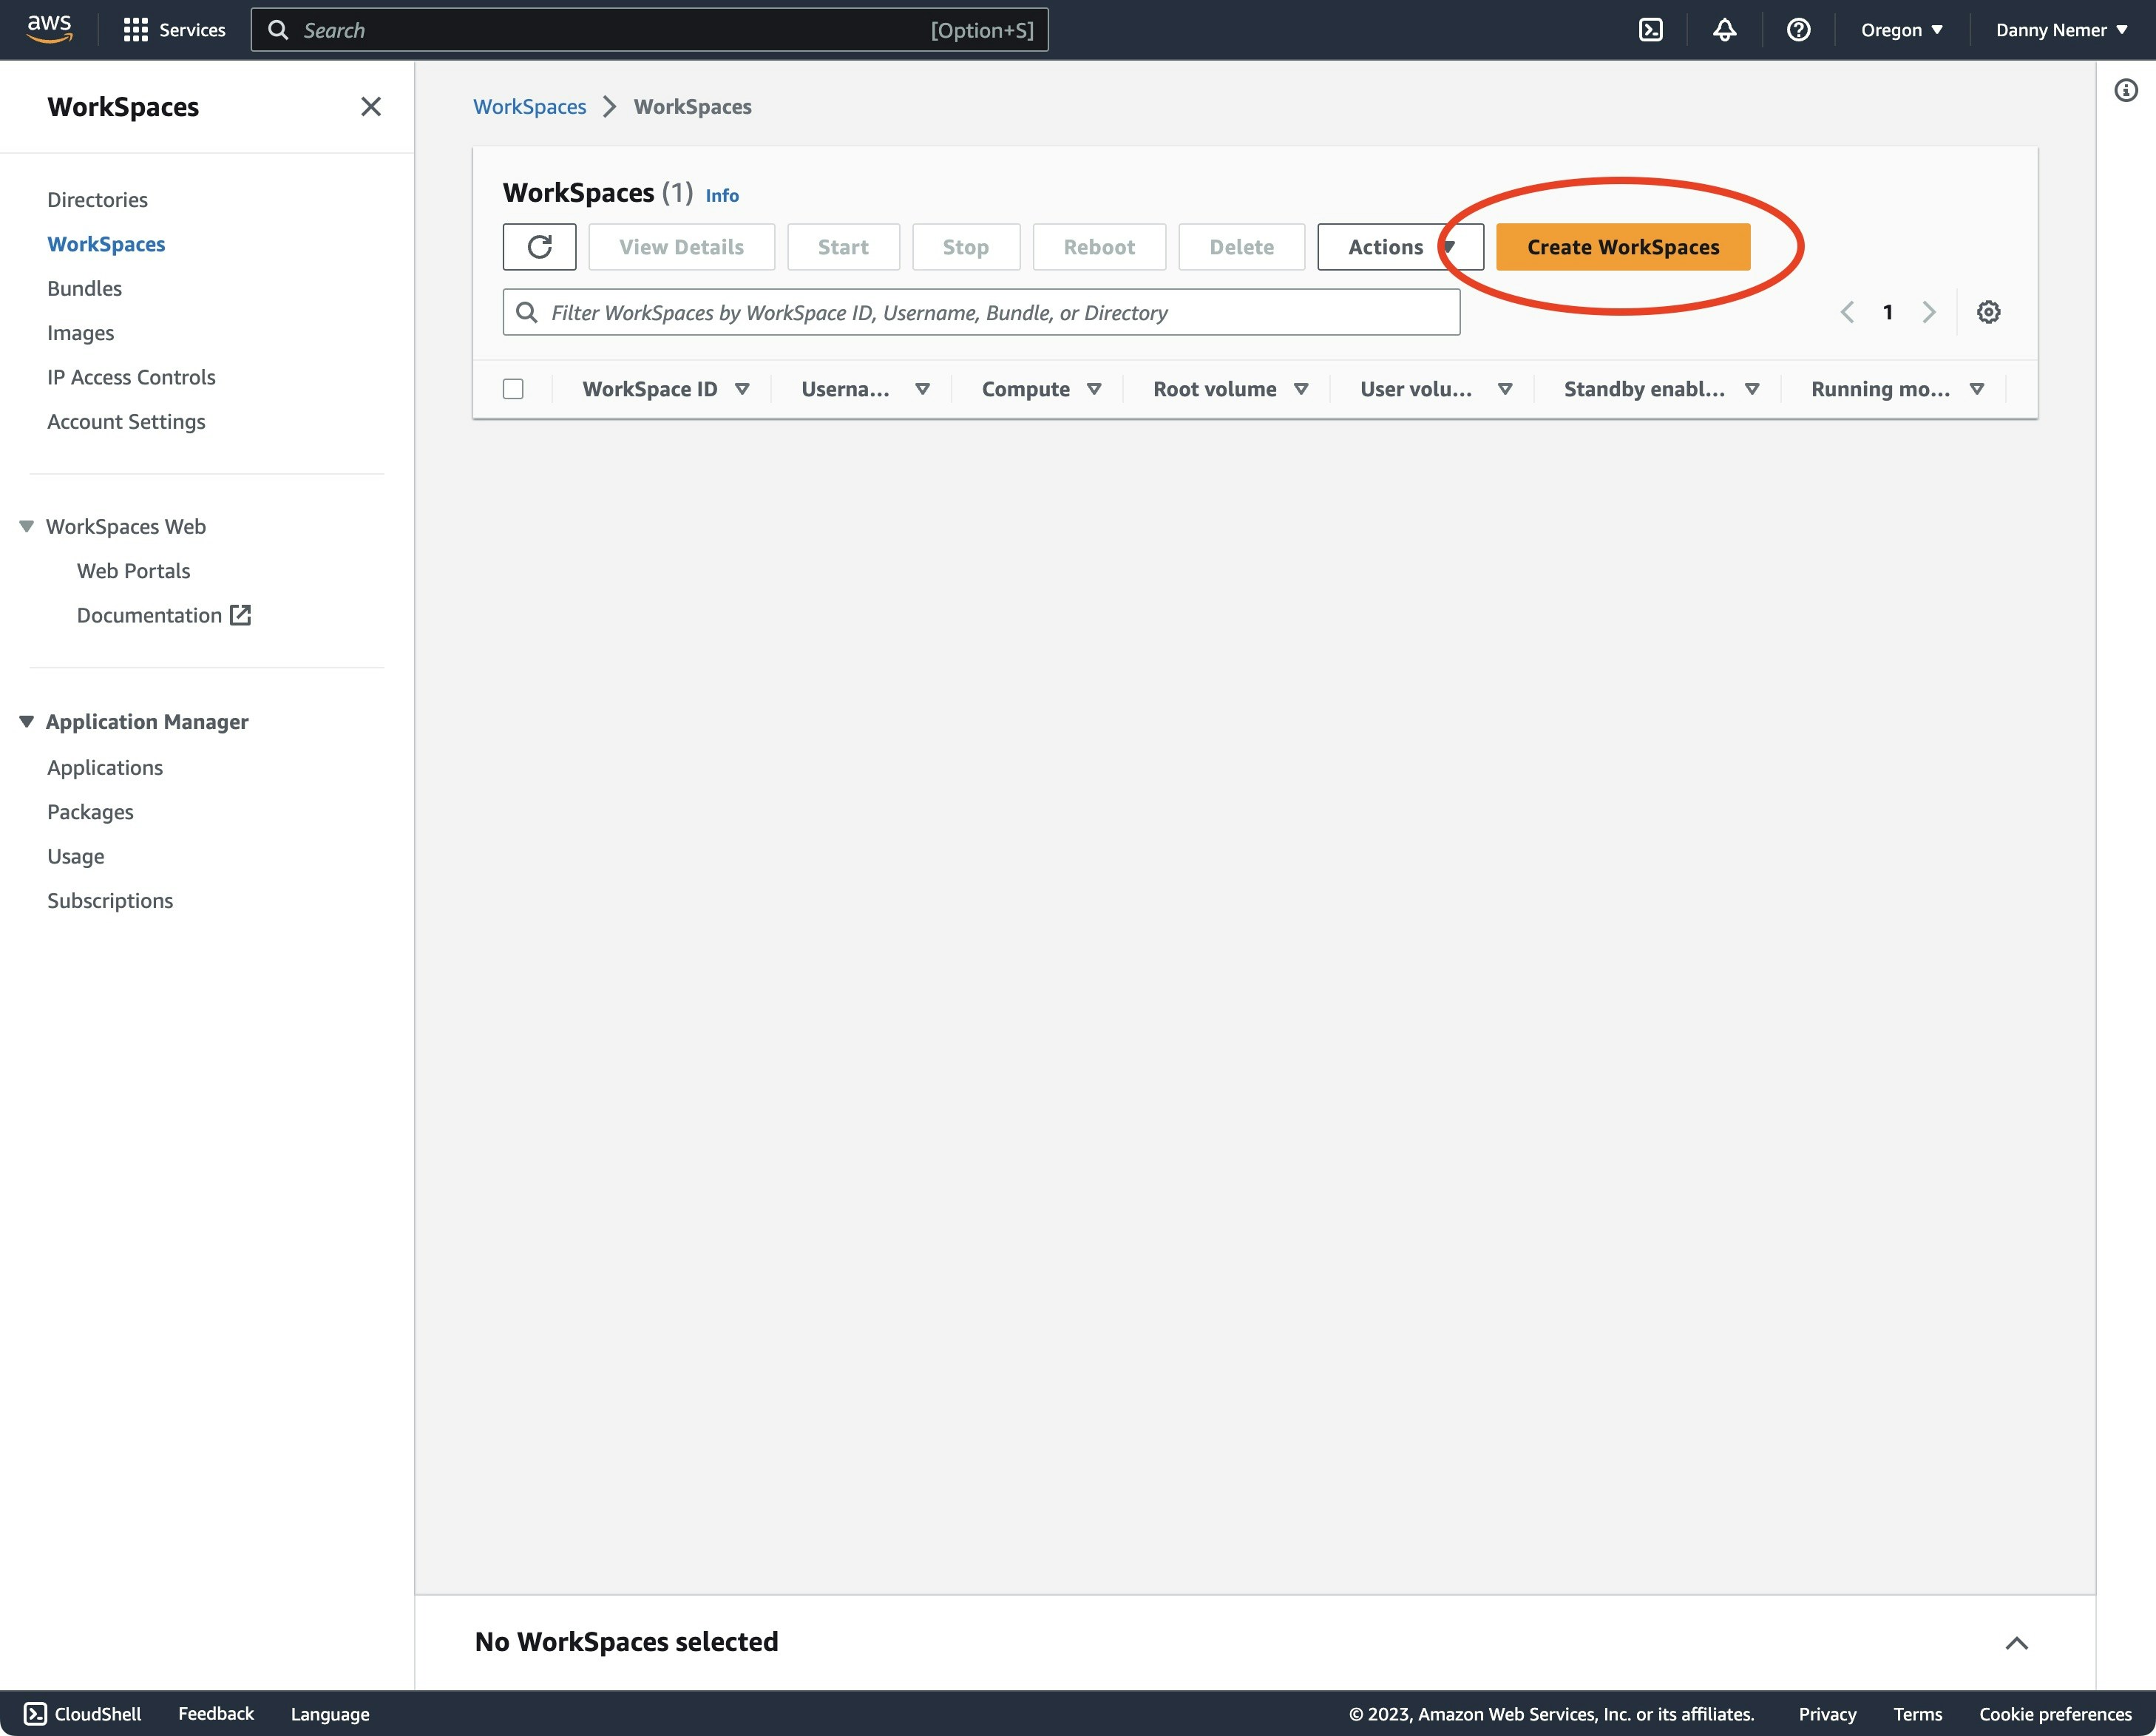
Create a new Amazon WorkSpace at [https://us-west-2.console.aws.amazon.com/workspaces/v2/workspaces](https://us-west-2.console.aws.amazon.com/workspaces/v2/workspaces).
;
To develop and test integrations with Conductor, you need your own QuickBooks Desktop instance to send and receive data. This guide shows you how to set up a QuickBooks Desktop test environment by creating a virtual Windows instance and installing the QuickBooks Desktop free trial. Once set up, you can connect to this QuickBooks Desktop test instance from your local development environment via Conductor.
**Also important**: This guide may be outdated as AWS WorkSpaces.
Alternatively, check out [this
guide](https://chatgpt.com/share/67813957-e52c-8003-8776-be82b725215f) or
asking an LLM (like ChatGPT) for different approaches to setting up a Windows
instance with QuickBooks Desktop installed.
## 1. Set up a virtual Windows environment
Create a new Amazon WorkSpace at [https://us-west-2.console.aws.amazon.com/workspaces/v2/workspaces](https://us-west-2.console.aws.amazon.com/workspaces/v2/workspaces).
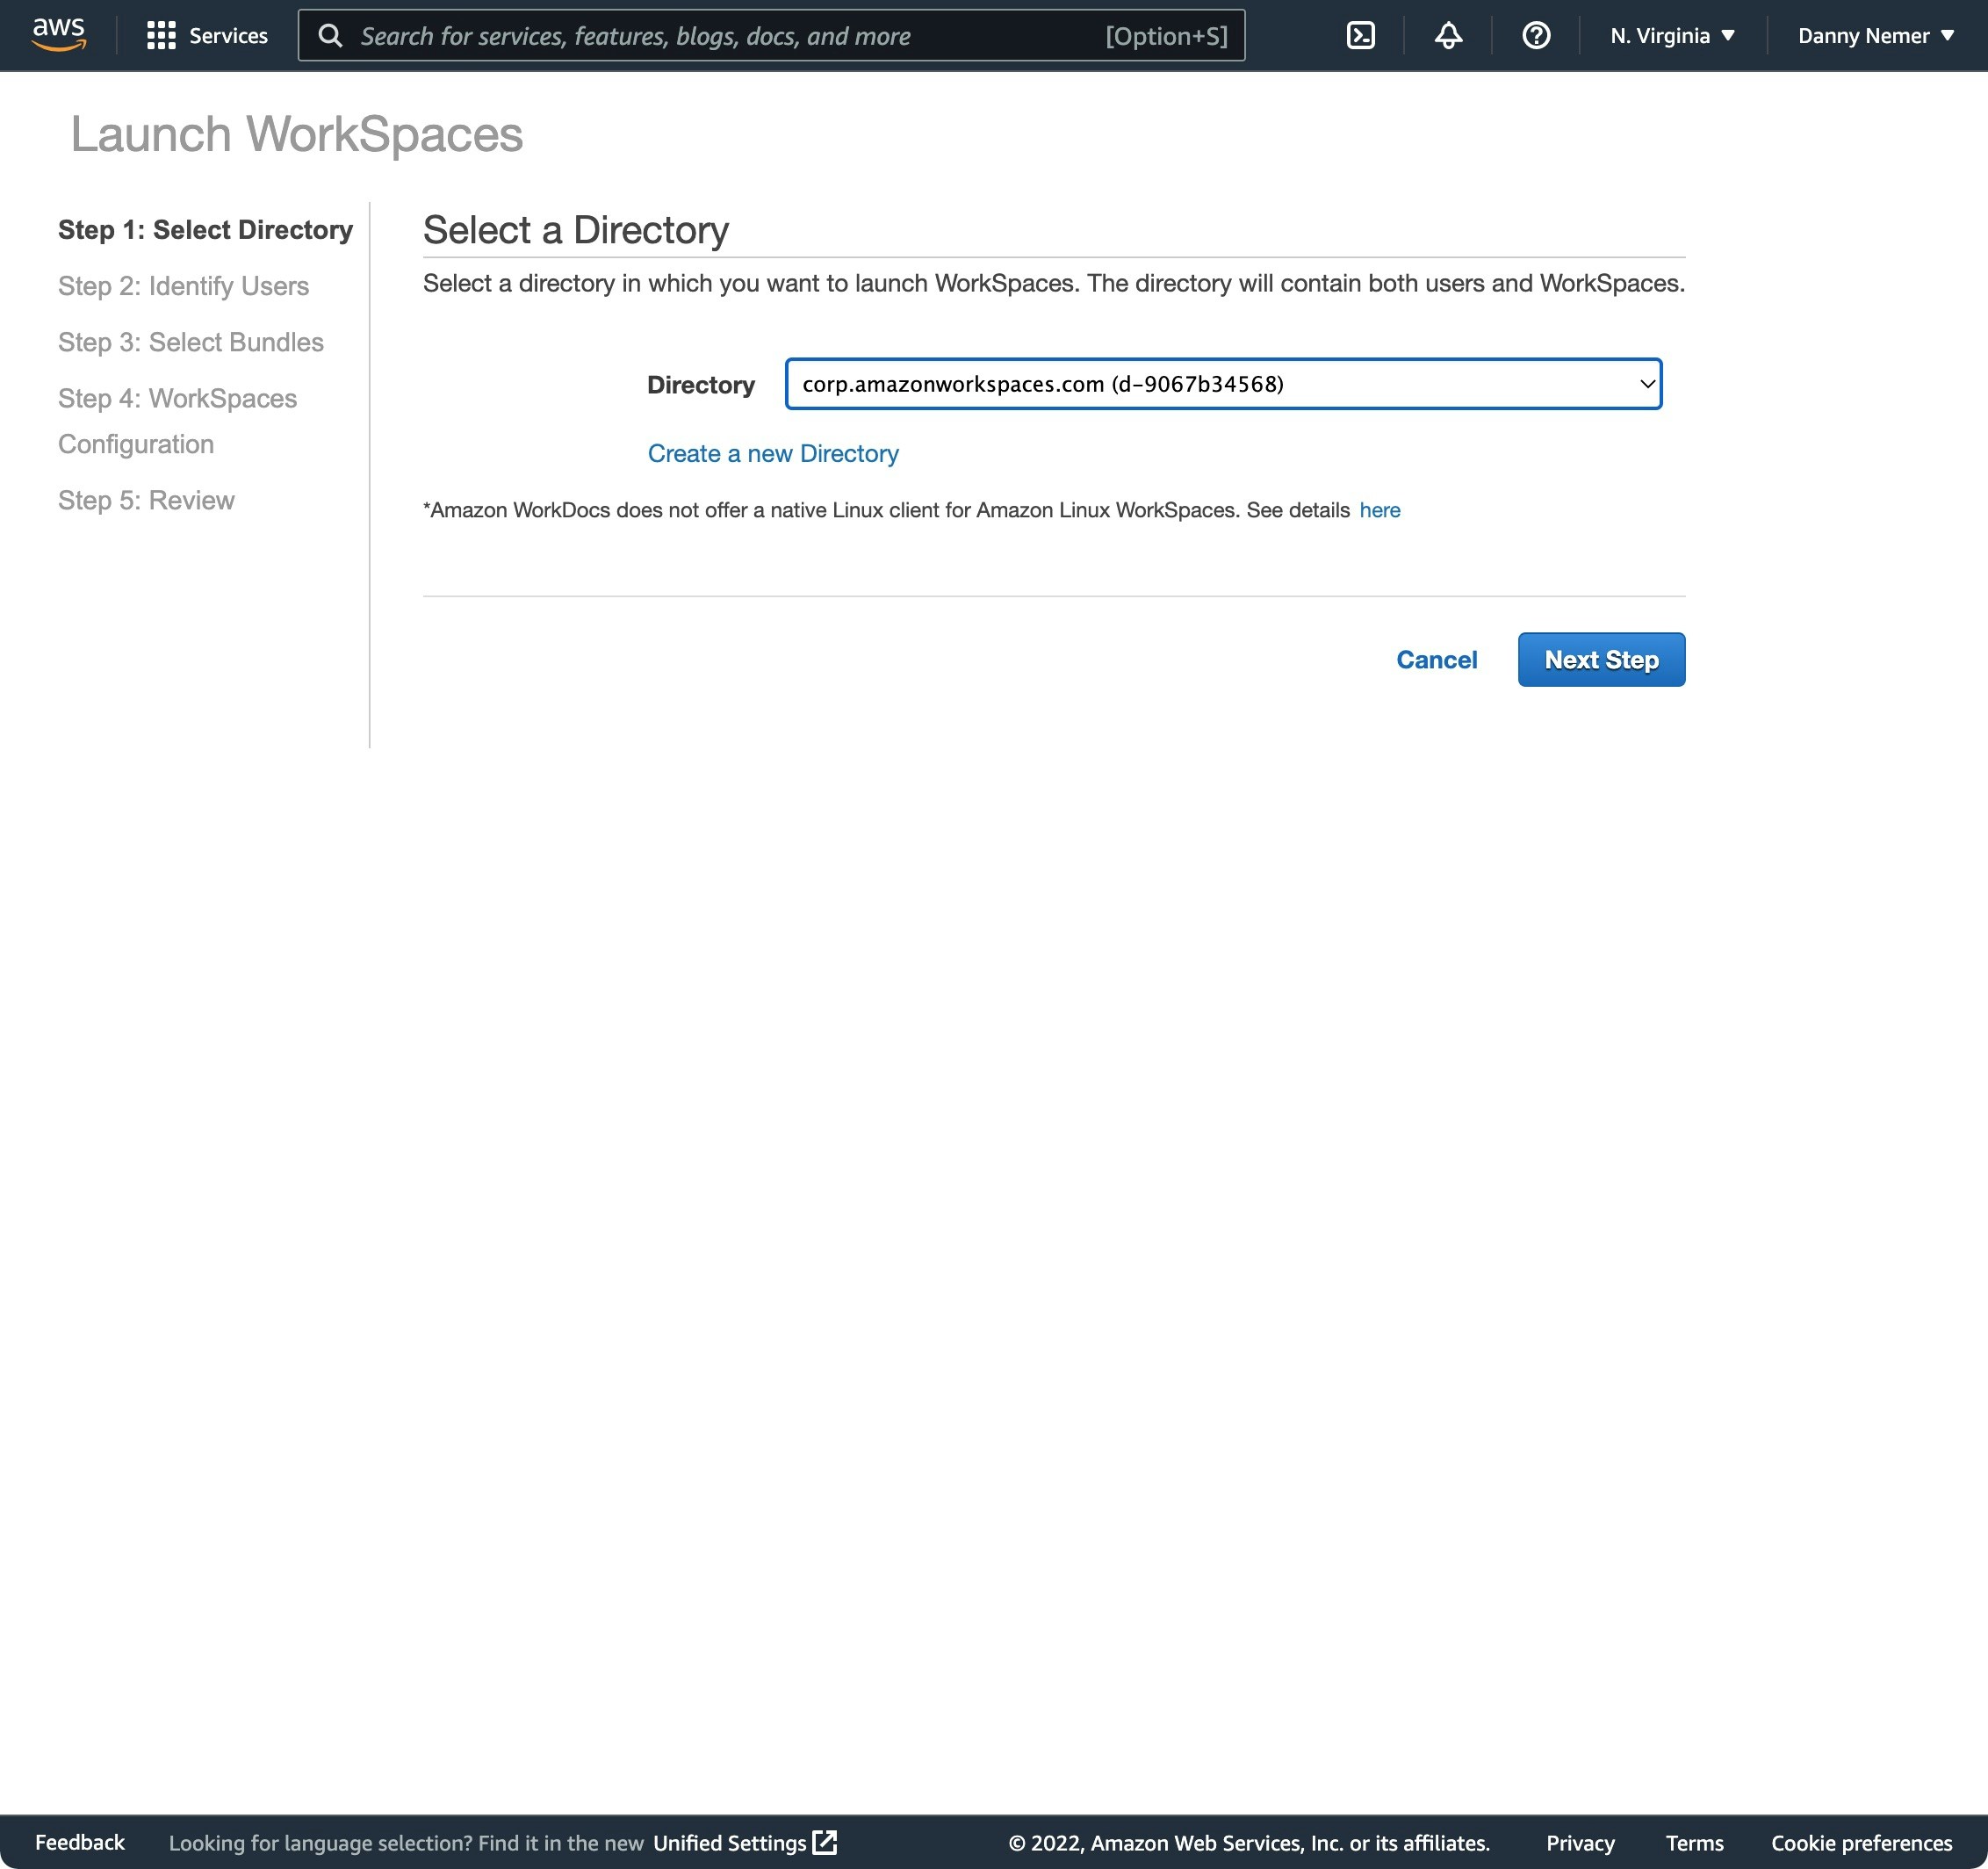
 Either select the directory in the list or click `Create a new Directory` if there are none:
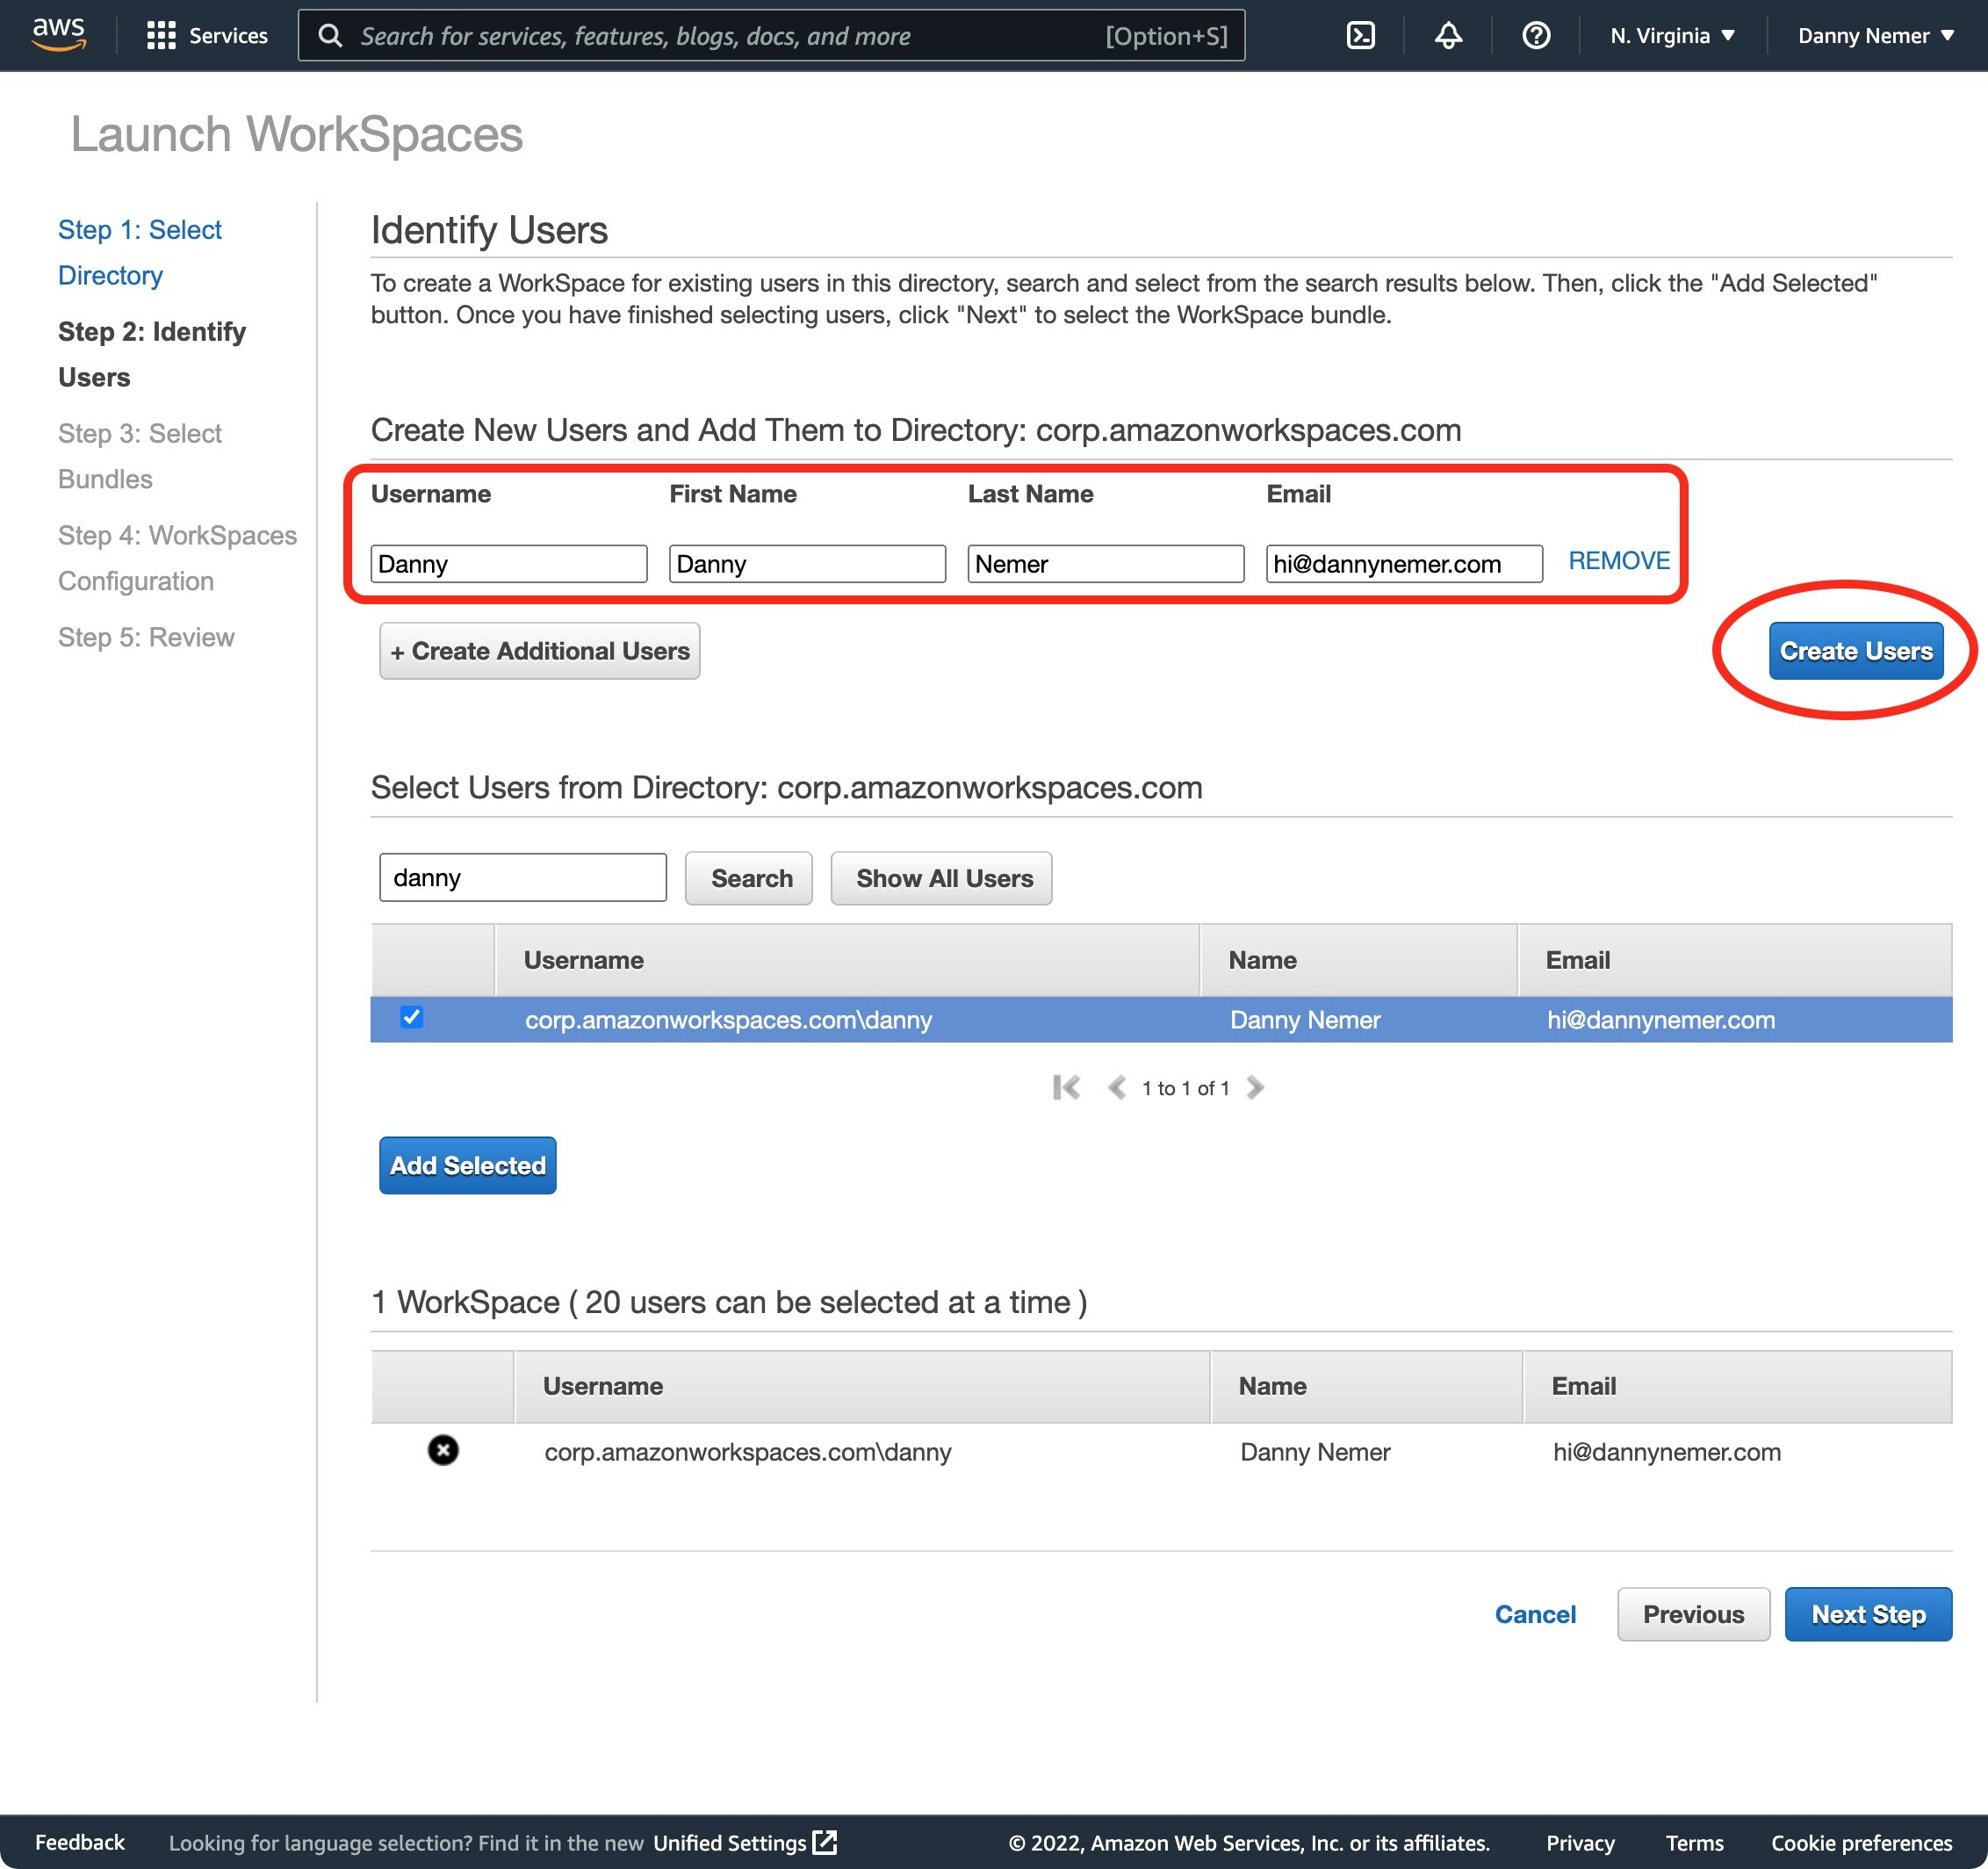
 Add yourself as a user with your email address:
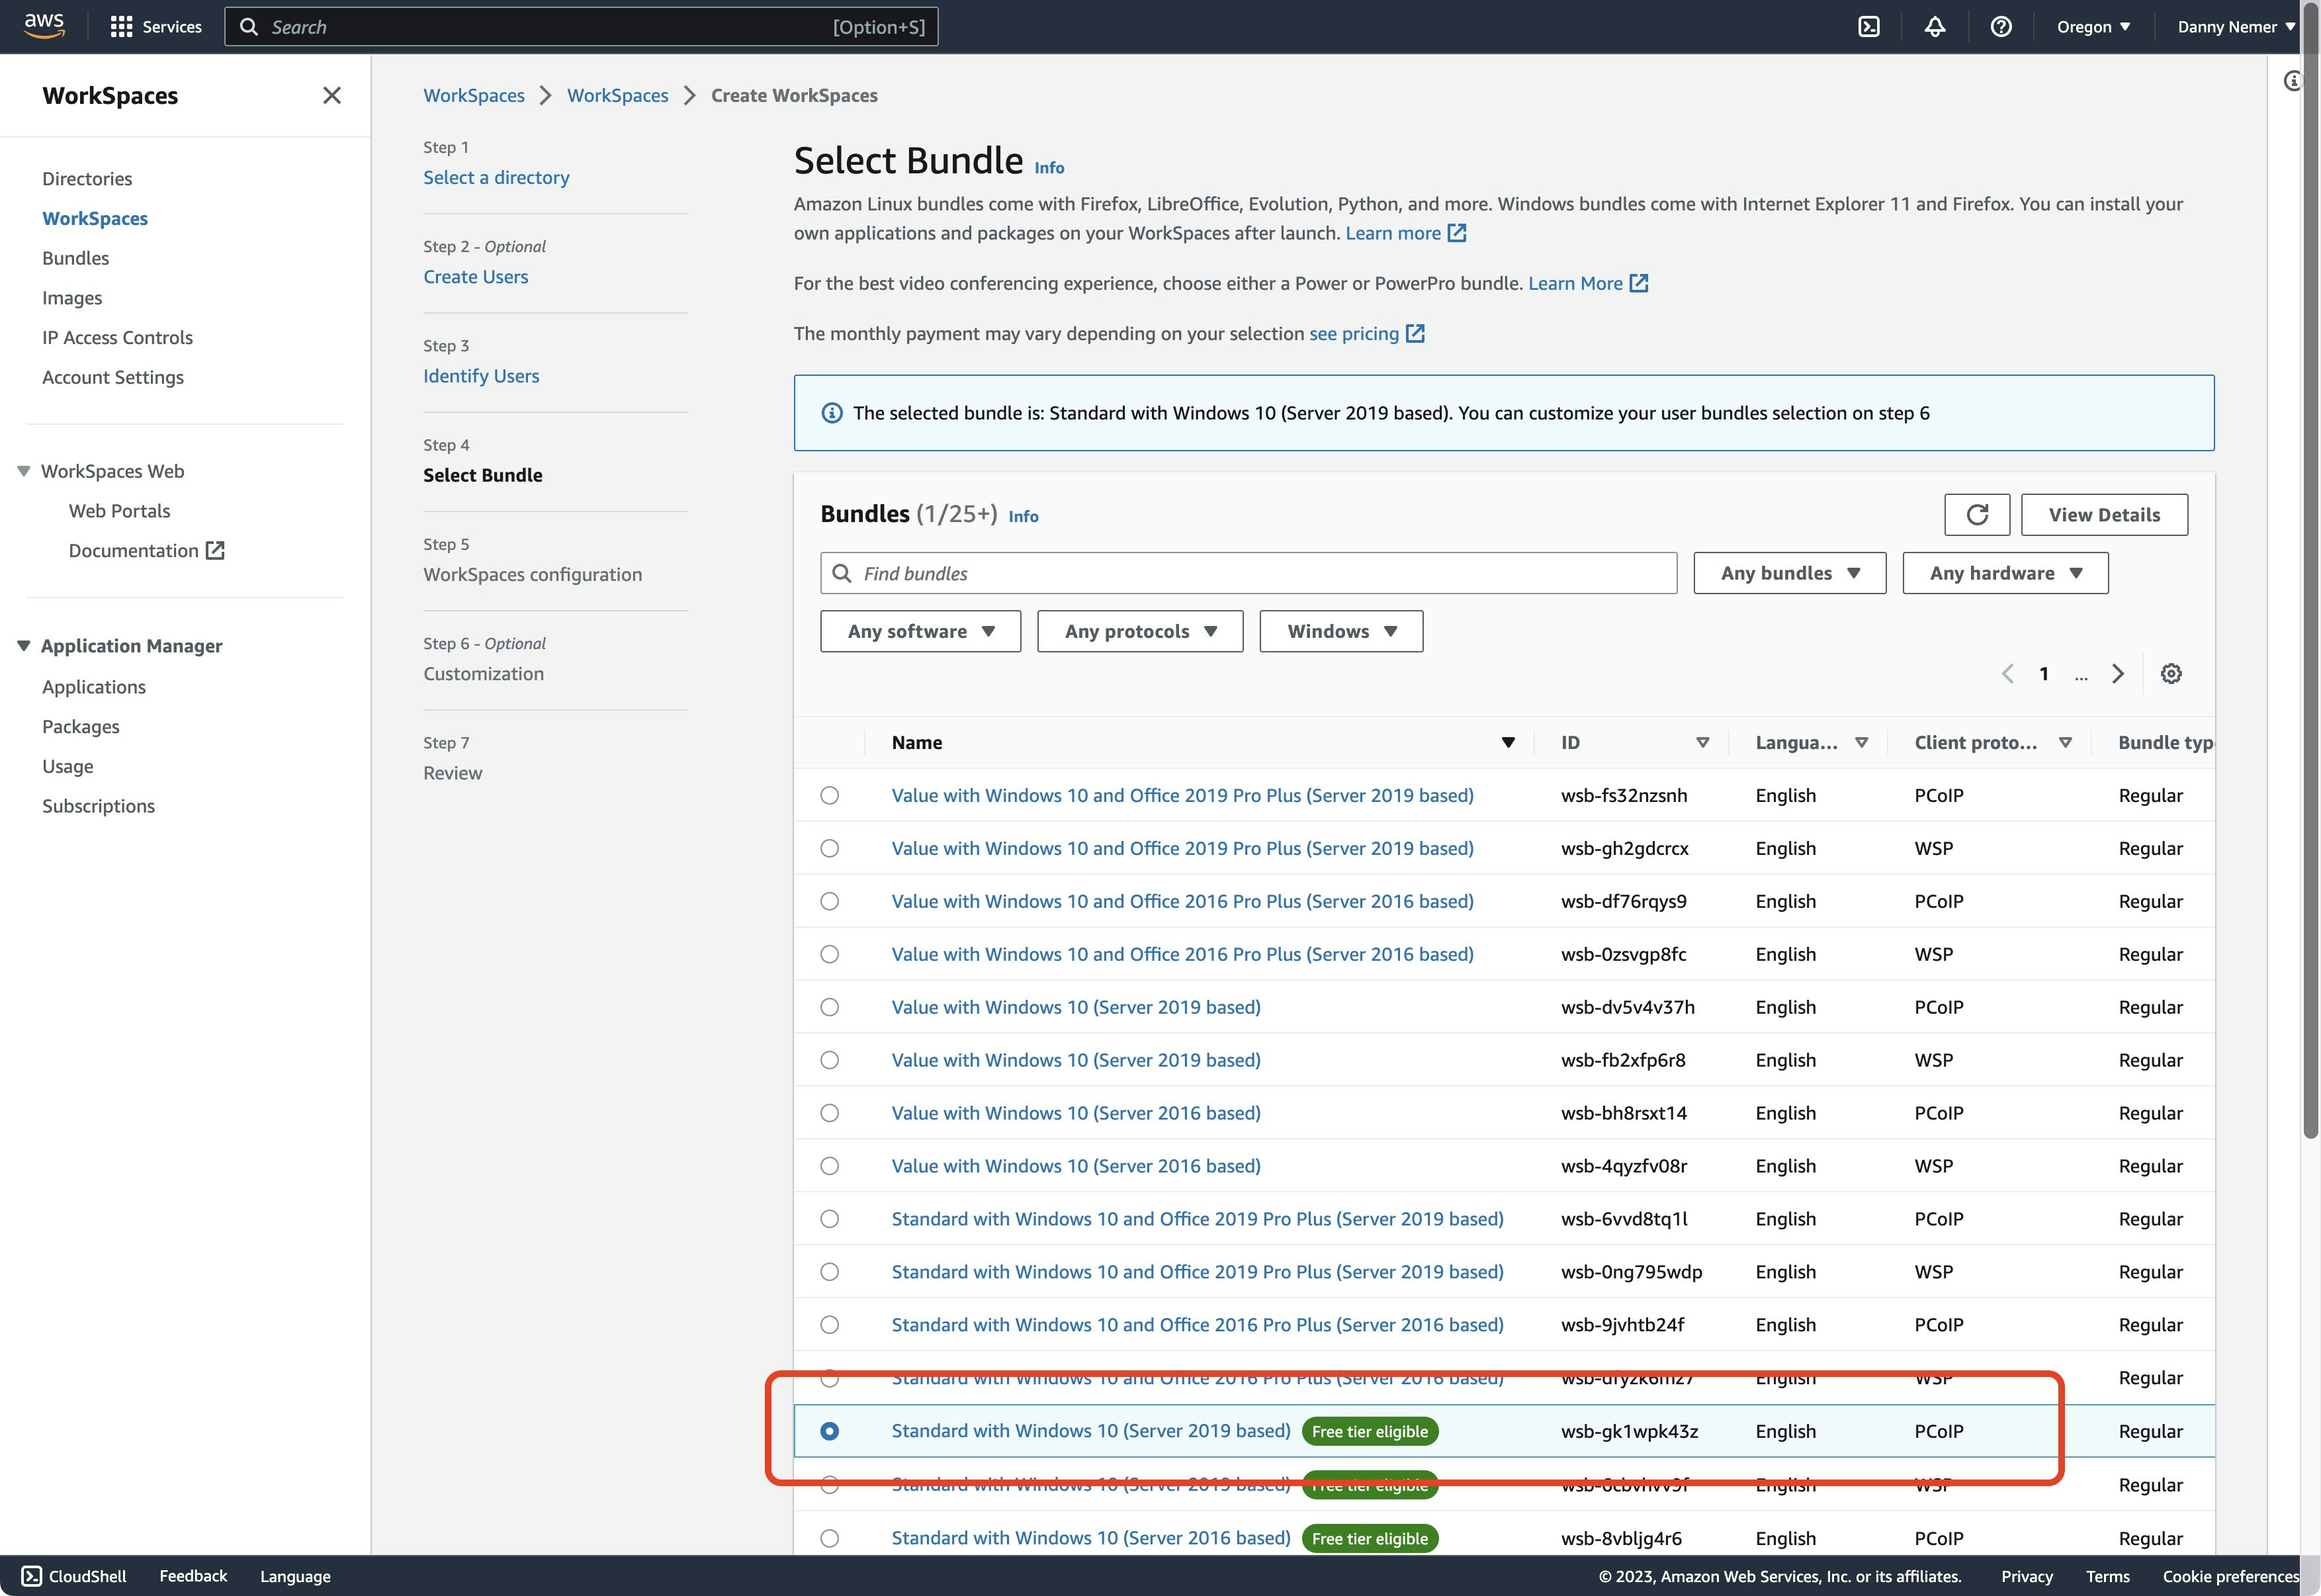
 Select the bundle `Standard with Windows 10 (Server 2019 based) (PCoIP)`:
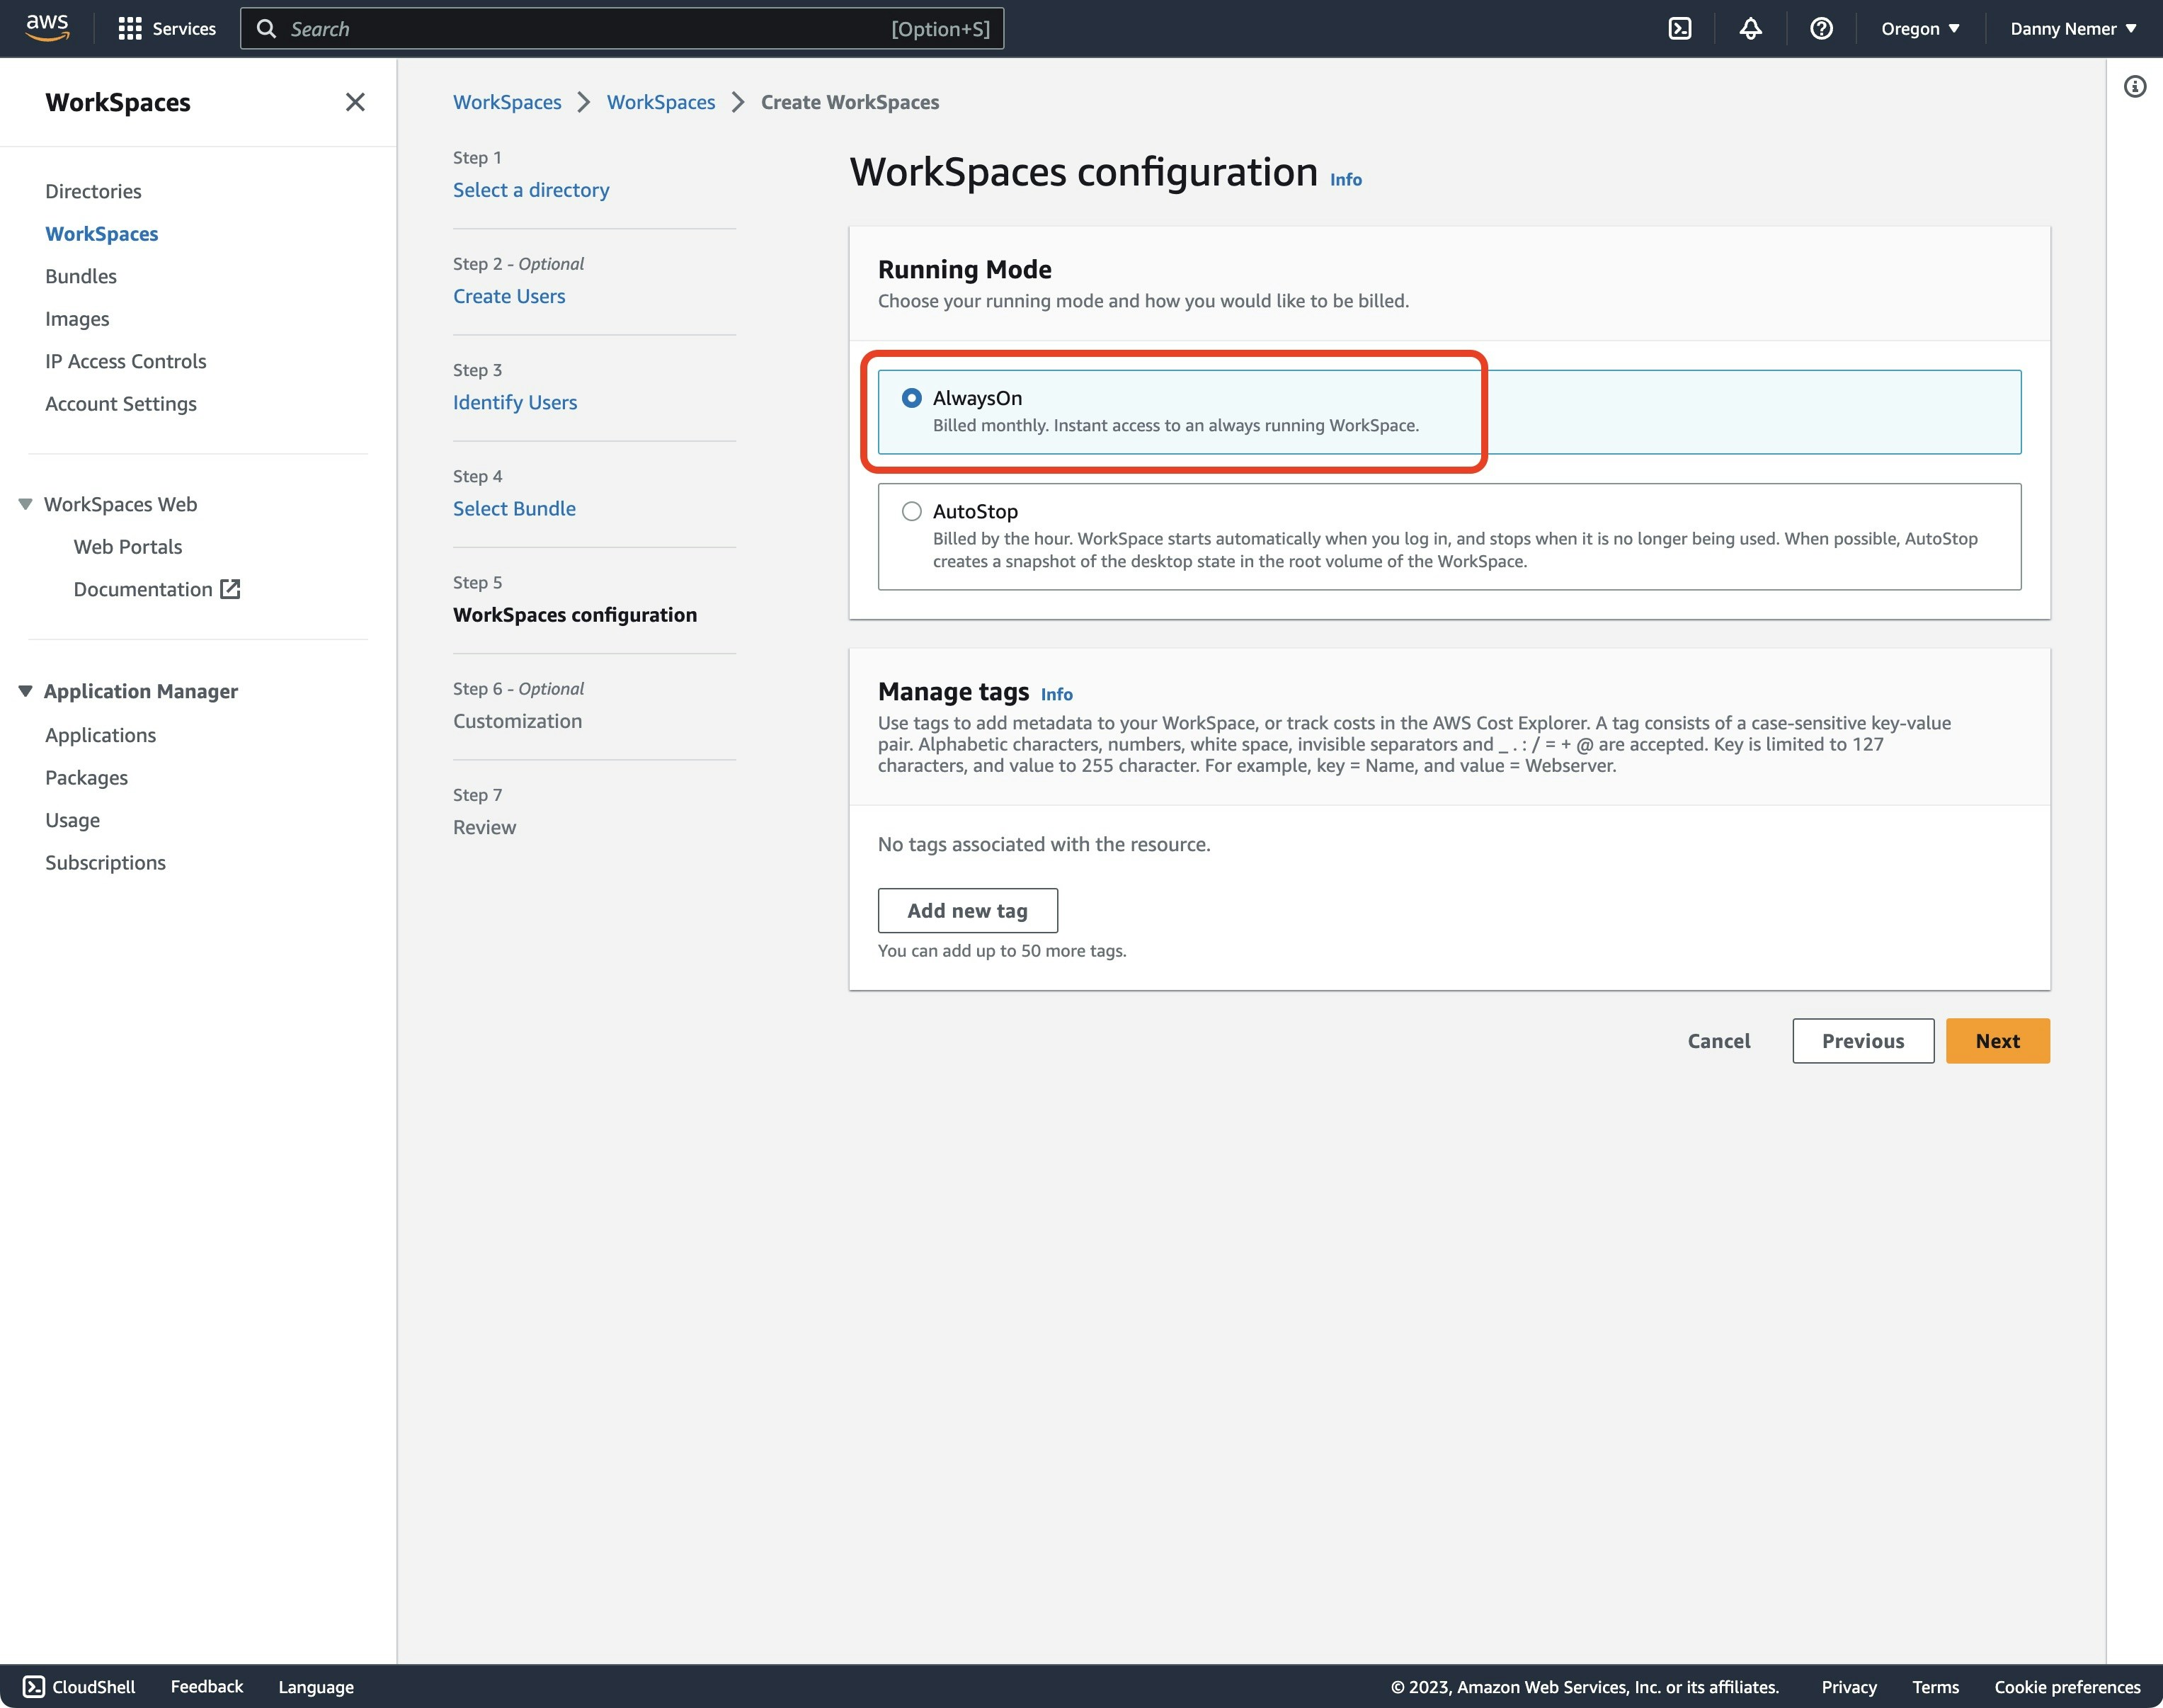
 Select `AlwaysOn`:
 Skip the Customization step, then review the final page and click the button `Create` in the bottom-right corner:
 After 20-30 minutes, look for an email from Amazon WorkSpaces with a link to set a password.
Download Amazon WorkSpaces on your local computer:
```sh theme={"system"}
brew install amazon-workspaces
```
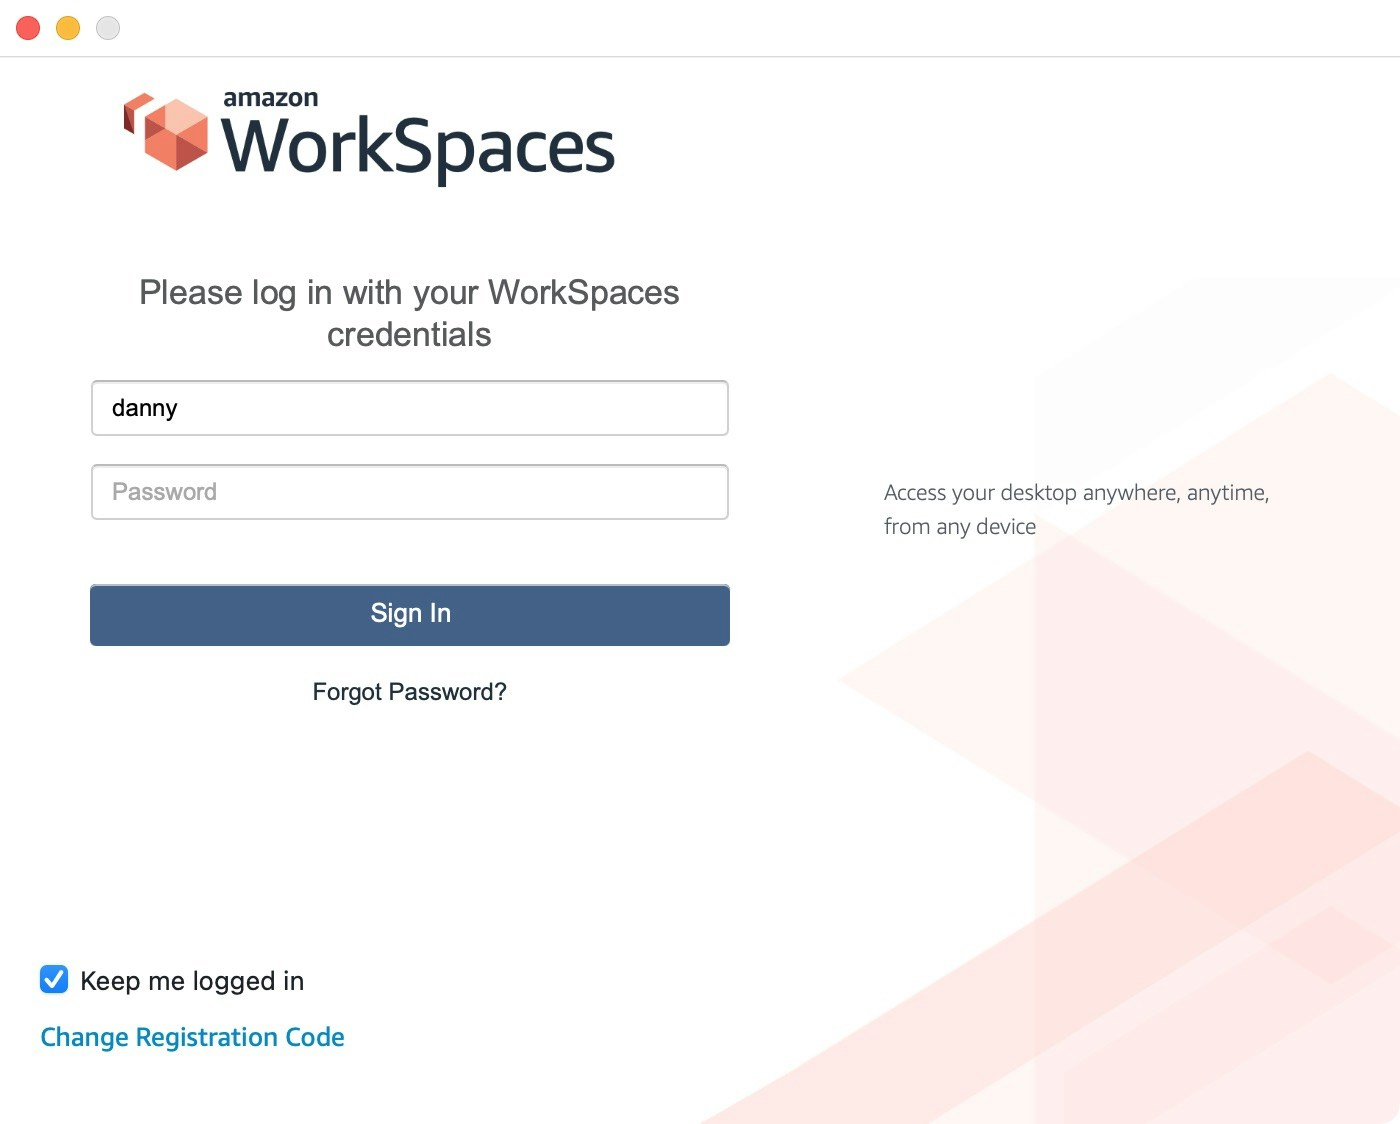
Open the WorkSpaces app, enter the registration key from the email, and sign in using the username and password you set via the reset link in the email. You must enter this password every time you open WorkSpaces, so best to save it to your local password manager.
After 20-30 minutes, look for an email from Amazon WorkSpaces with a link to set a password.
Download Amazon WorkSpaces on your local computer:
```sh theme={"system"}
brew install amazon-workspaces
```
Open the WorkSpaces app, enter the registration key from the email, and sign in using the username and password you set via the reset link in the email. You must enter this password every time you open WorkSpaces, so best to save it to your local password manager.
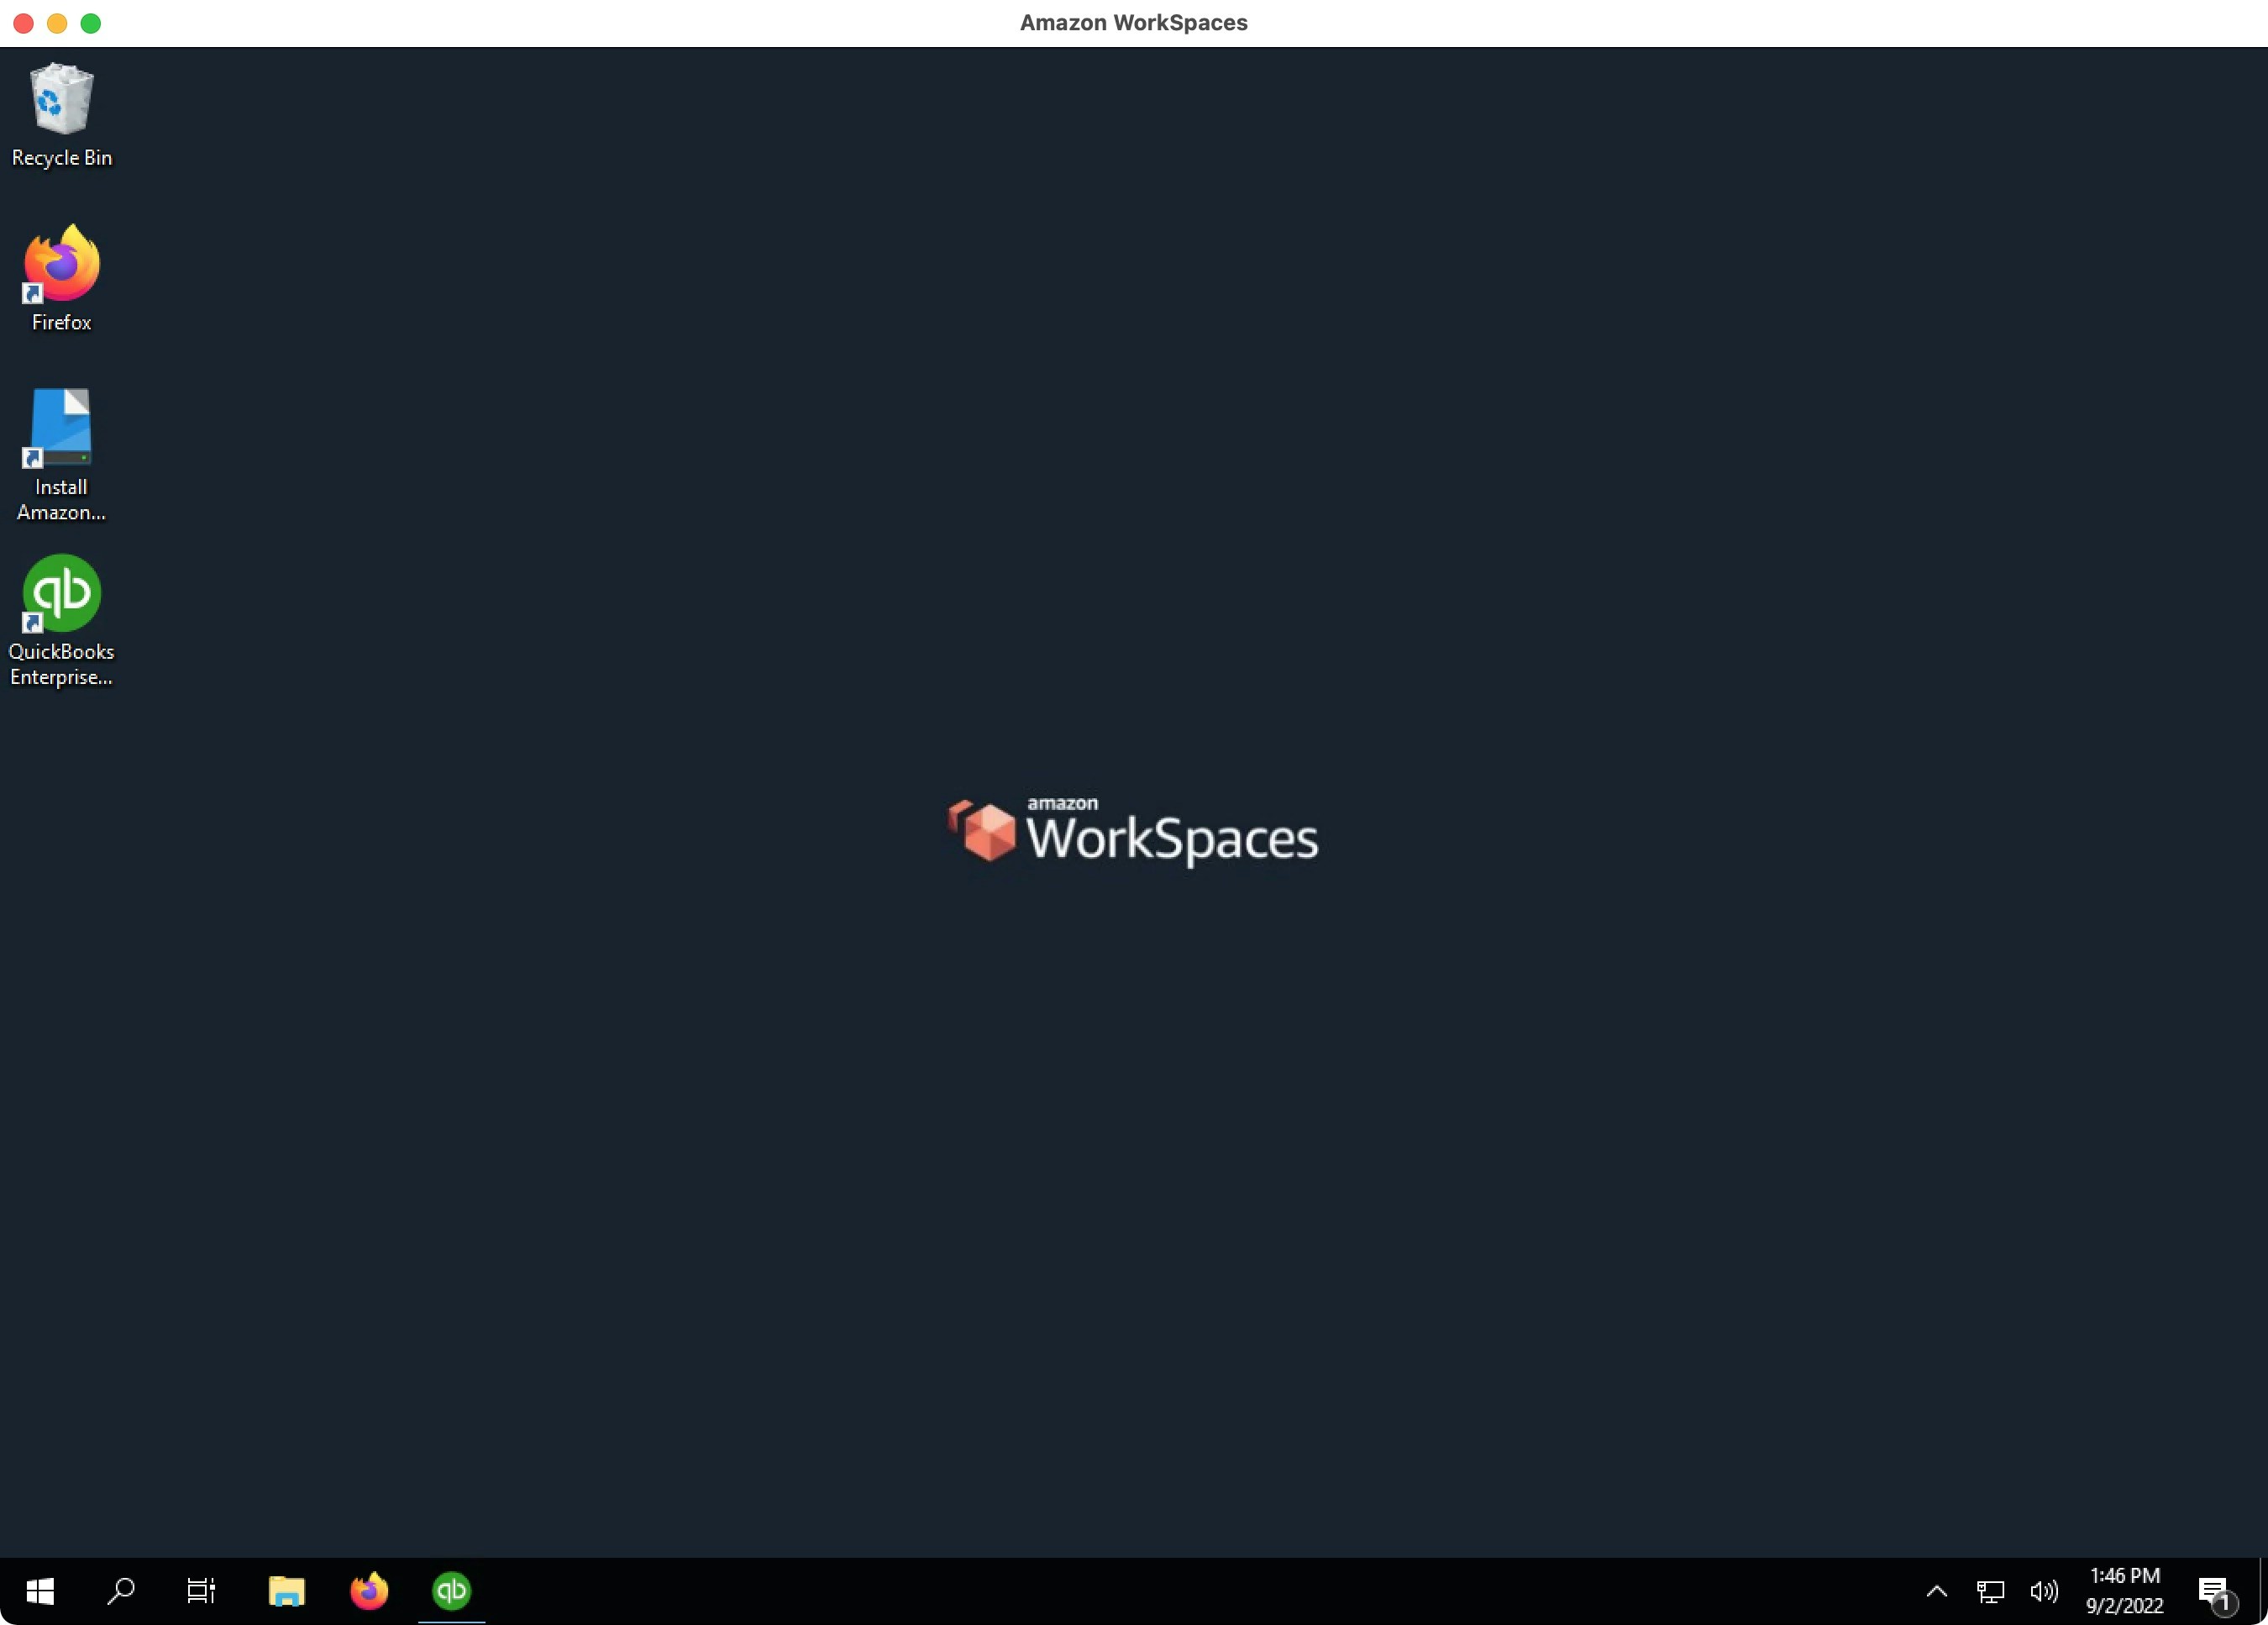
 After it loads, you will see your new Windows desktop instance!
 ## 2. Disable IE Enhanced Security Configuration
By default, you will see the following warning whenever you open QuickBooks Desktop. If you do not resolve this issue, this warning will freeze QuickBooks Desktop whenever the QuickBooks Web Connector opens QuickBooks Desktop when it is closed.
To prevent this error, follow these steps:
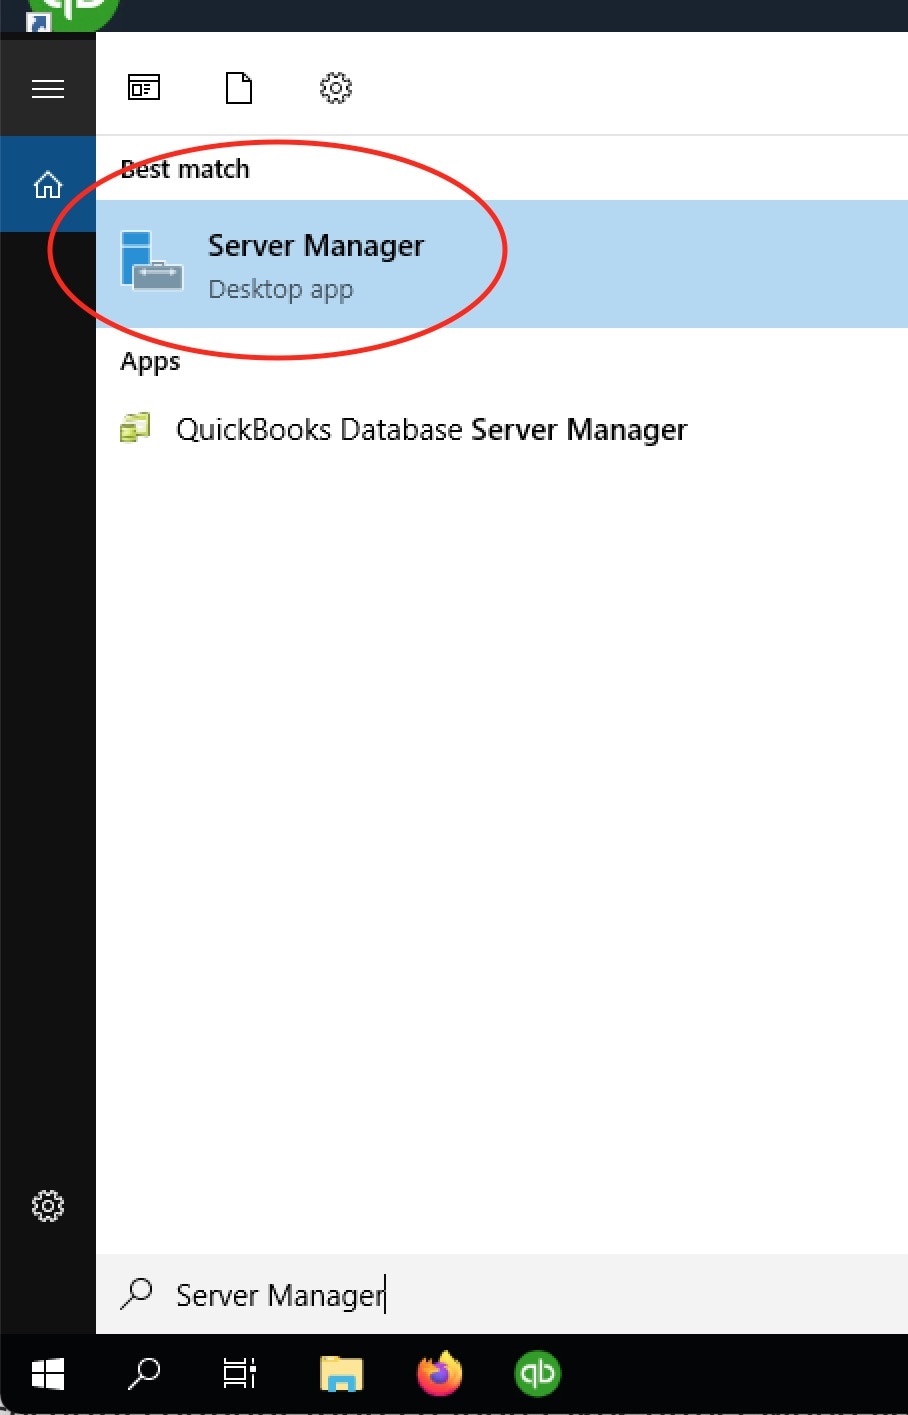
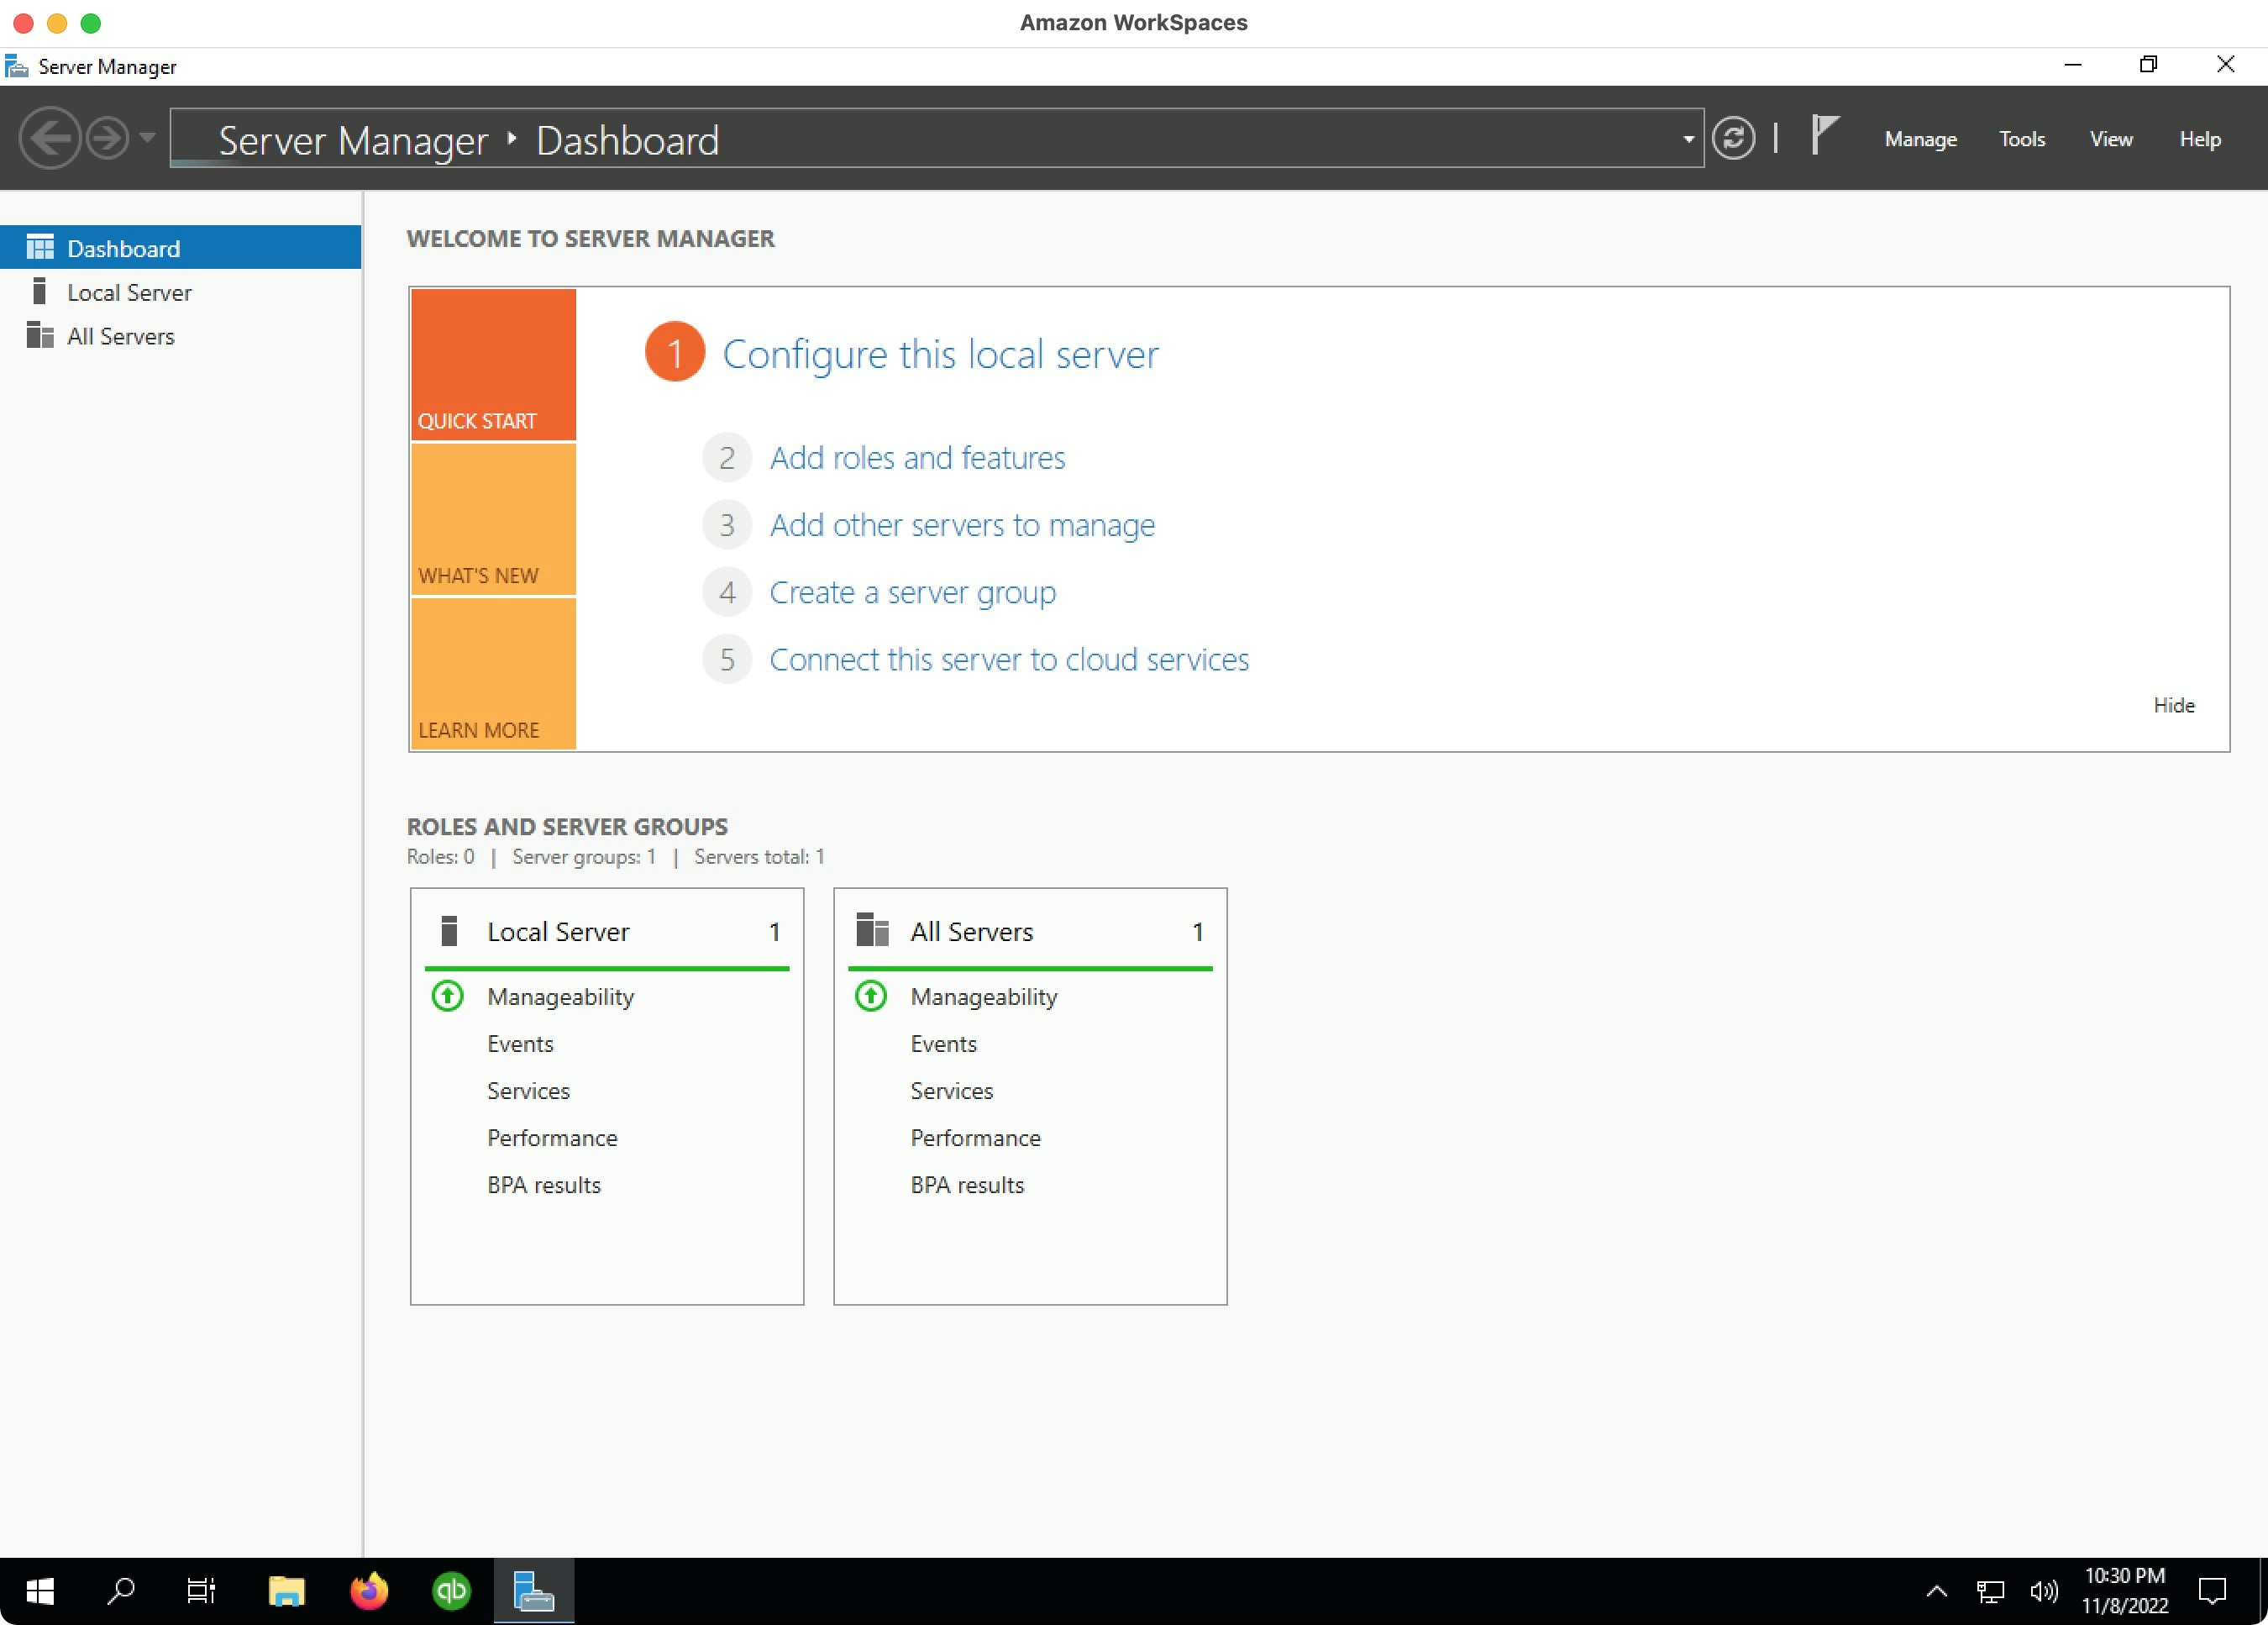
Search for and open Server Manager:
## 2. Disable IE Enhanced Security Configuration
By default, you will see the following warning whenever you open QuickBooks Desktop. If you do not resolve this issue, this warning will freeze QuickBooks Desktop whenever the QuickBooks Web Connector opens QuickBooks Desktop when it is closed.
To prevent this error, follow these steps:
Search for and open Server Manager:
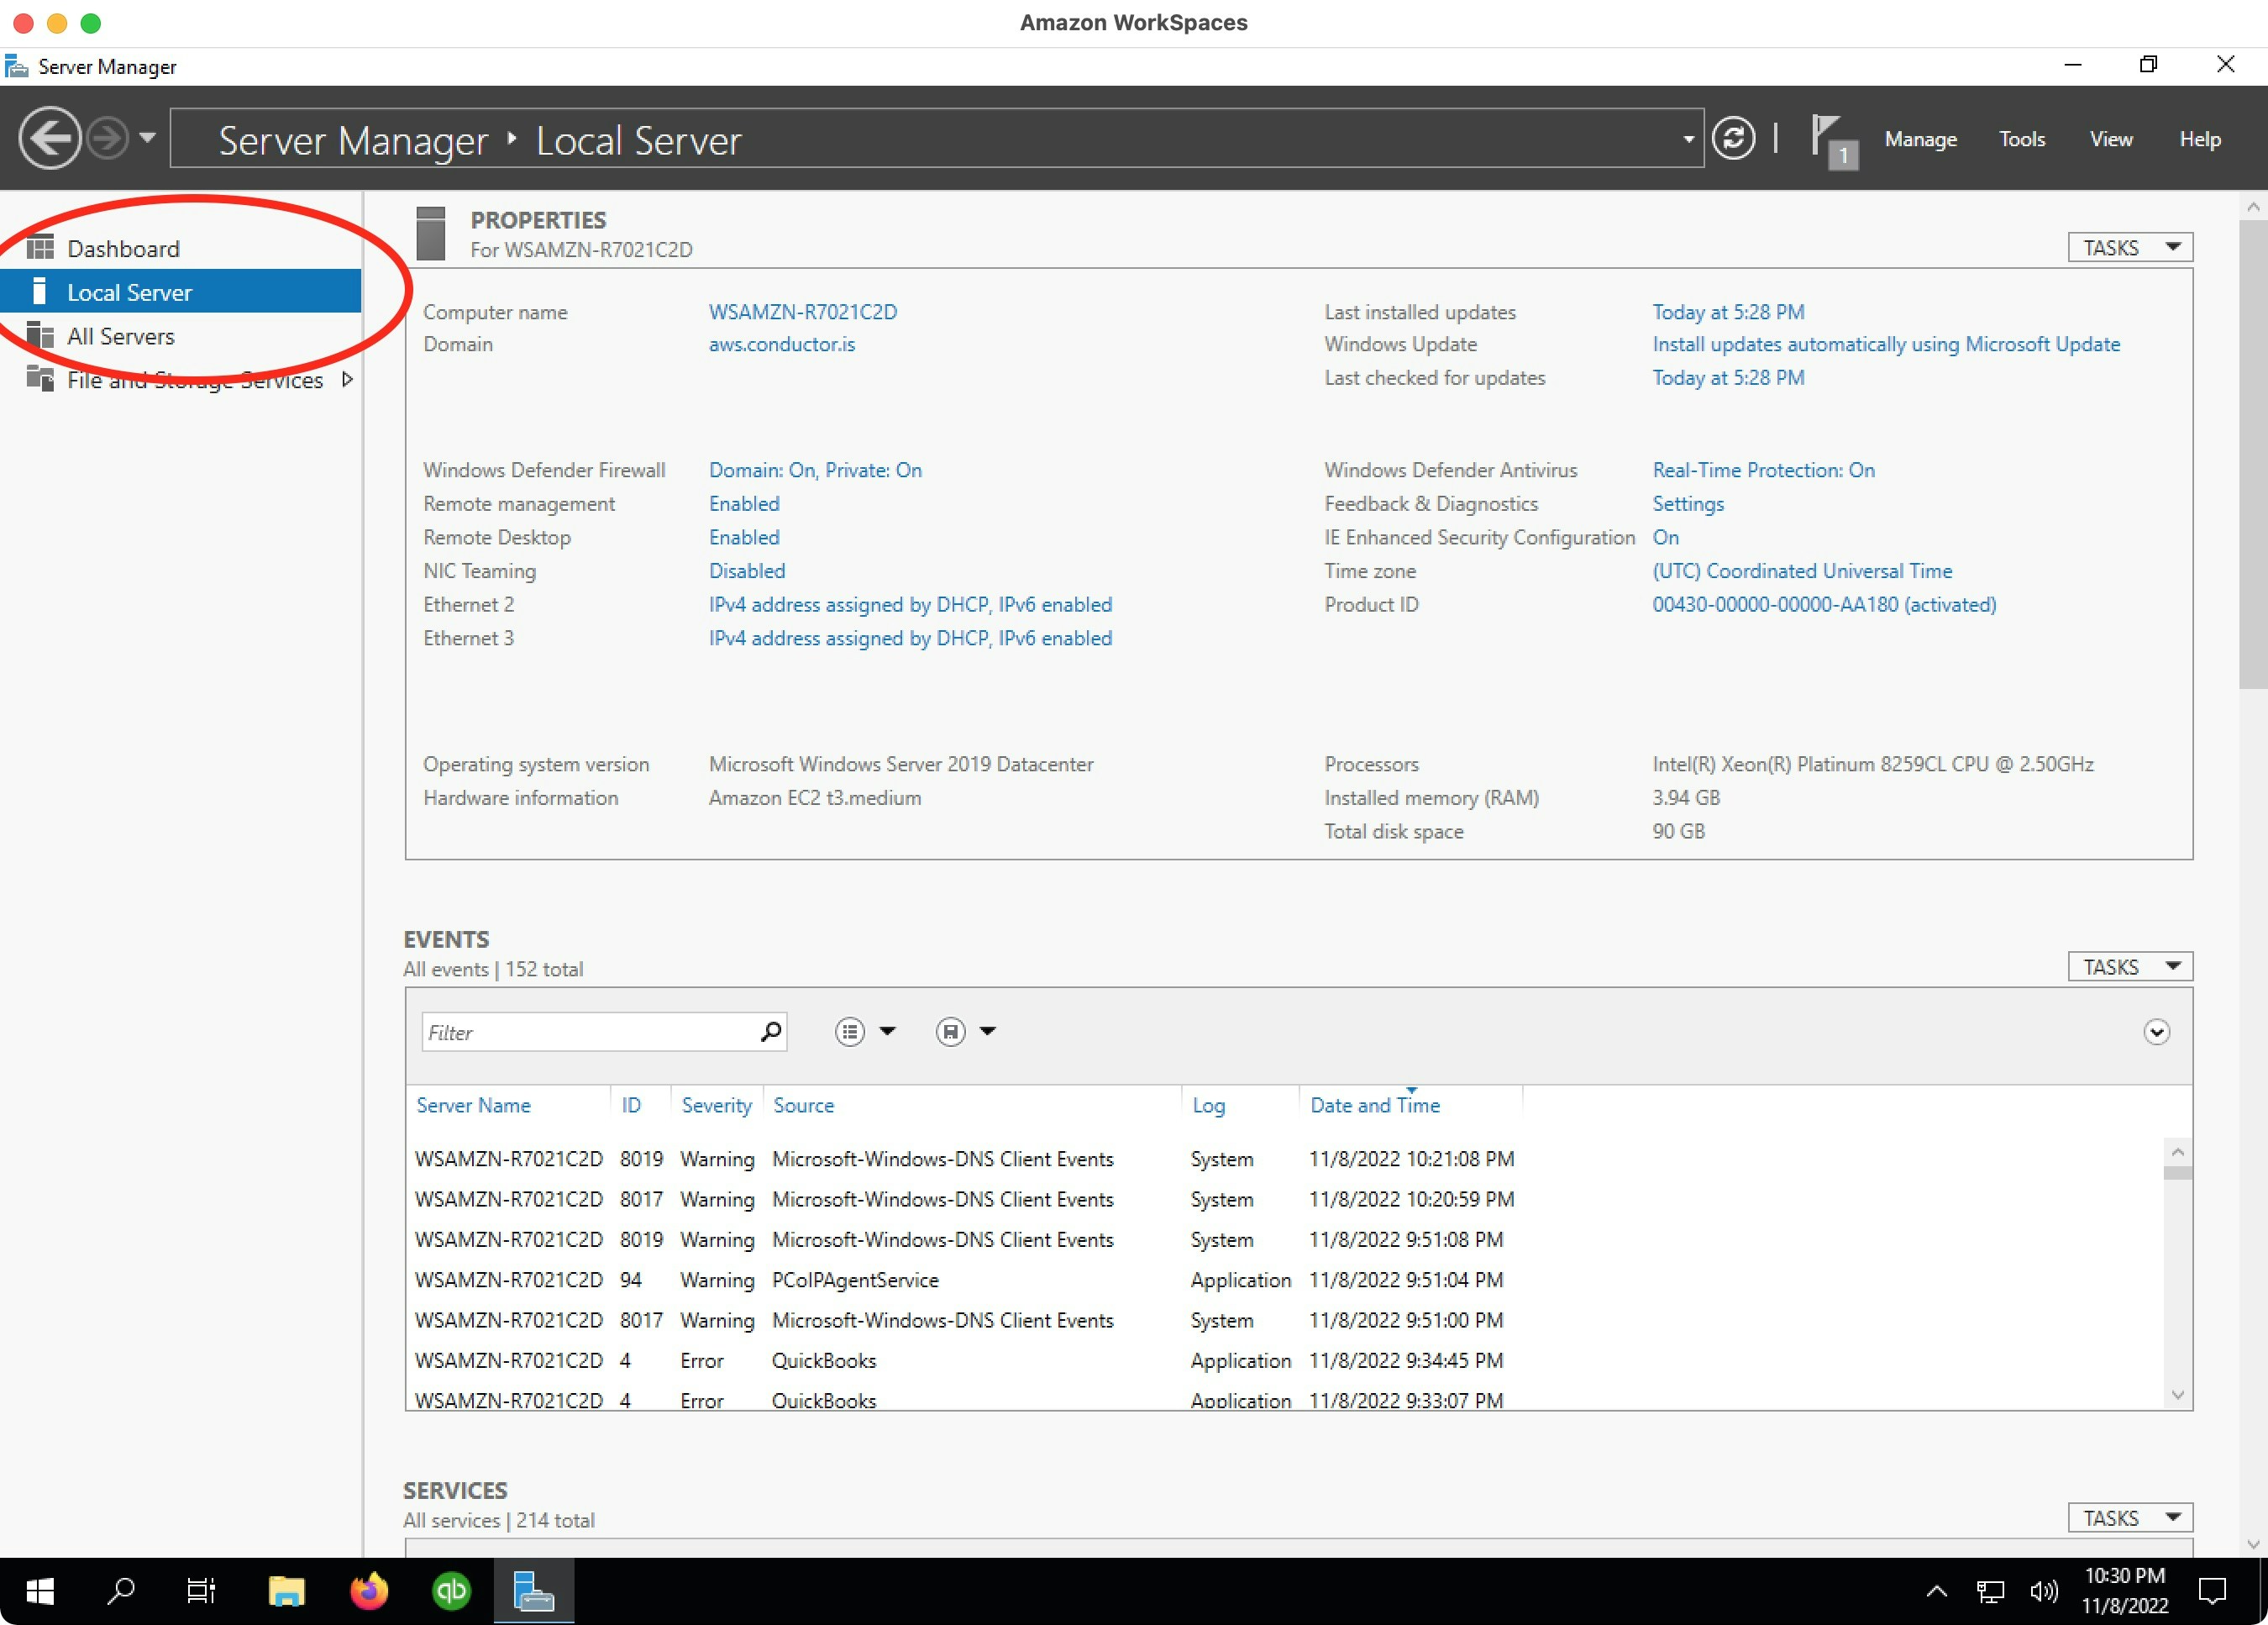
 Choose `Local Server` from the left navigation pane:
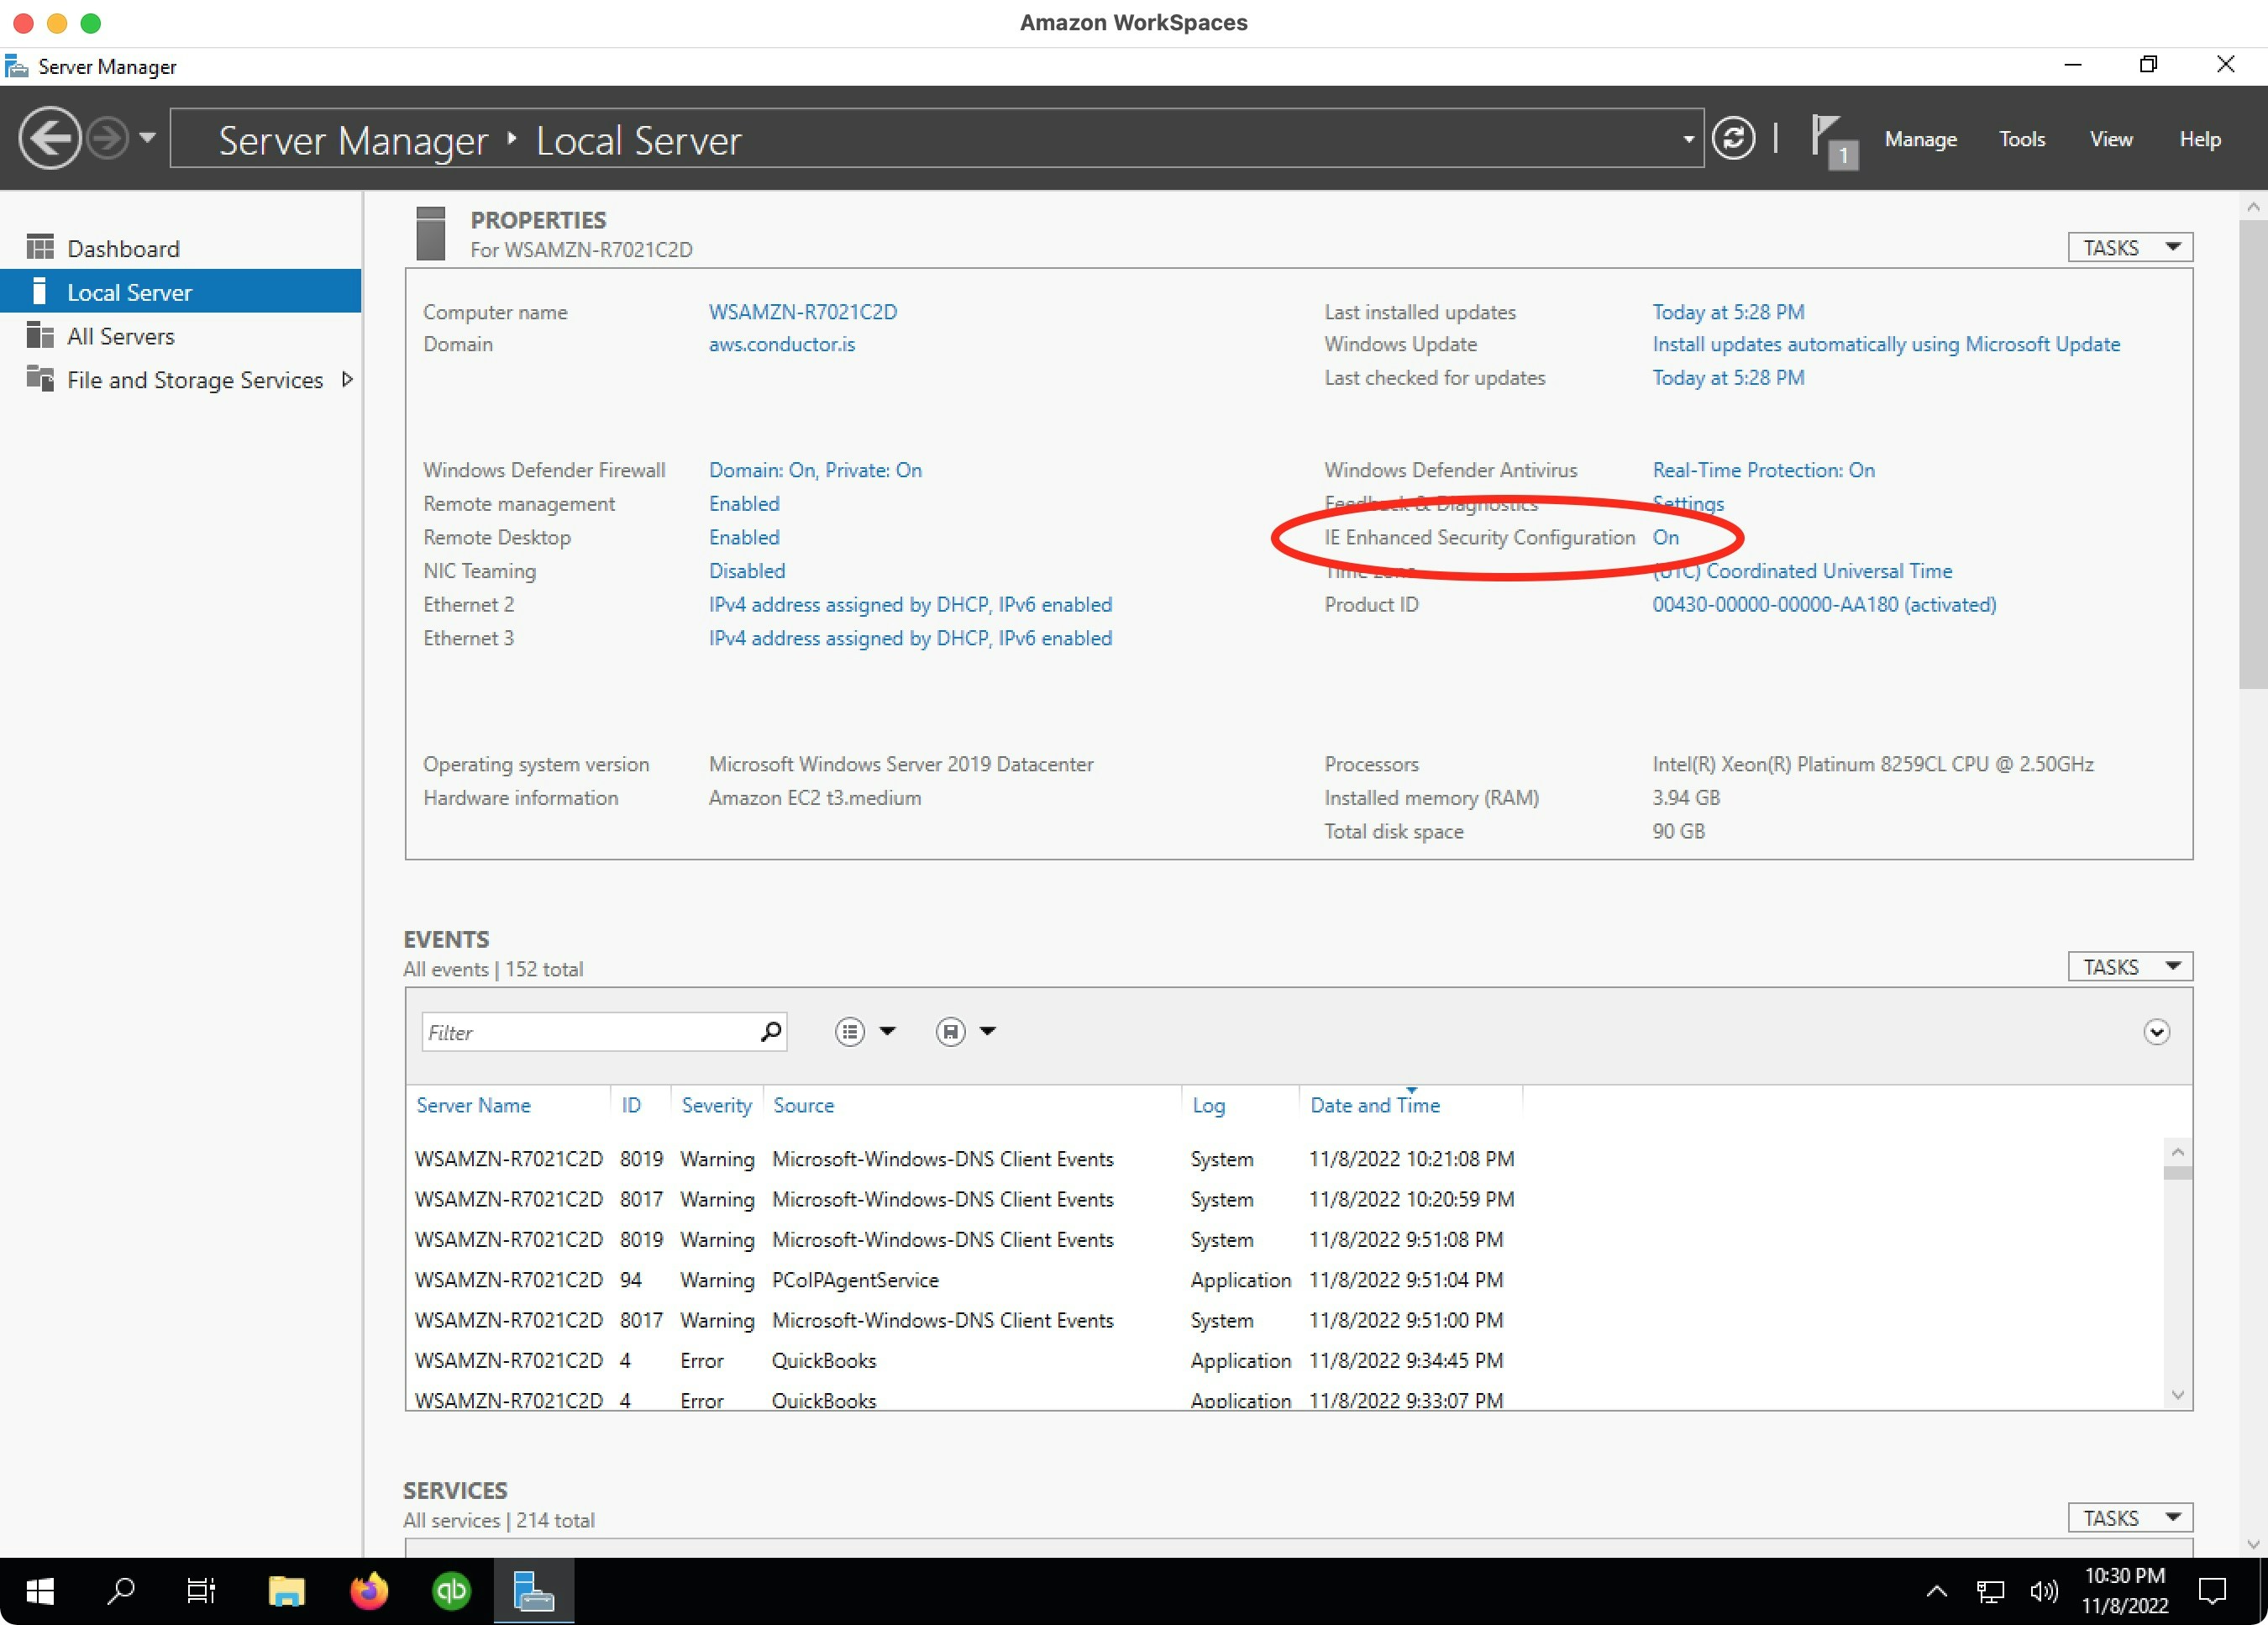
 For `IE Enhanced Security Configuration`, click the button that says `On`:
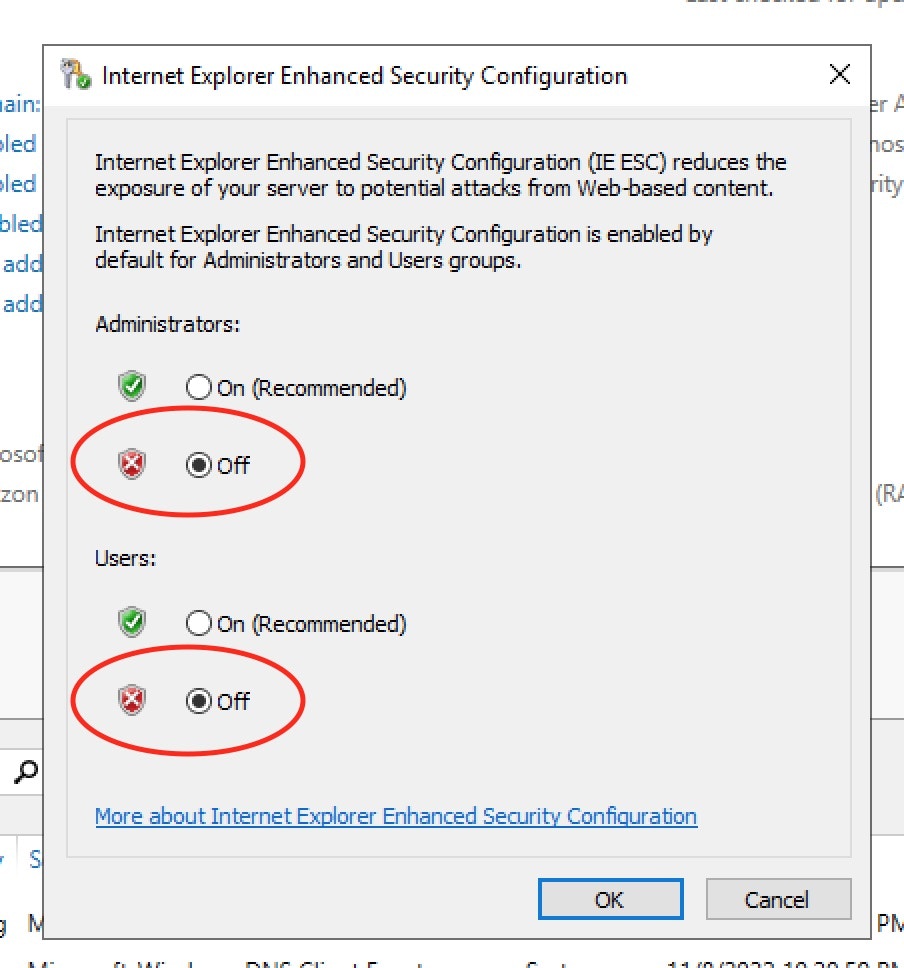
 For Administrators, select `Off`. For Users, select `Off`. Choose `OK`. Then
you are done!
For Administrators, select `Off`. For Users, select `Off`. Choose `OK`. Then
you are done!
 ## 3. Install QuickBooks Desktop
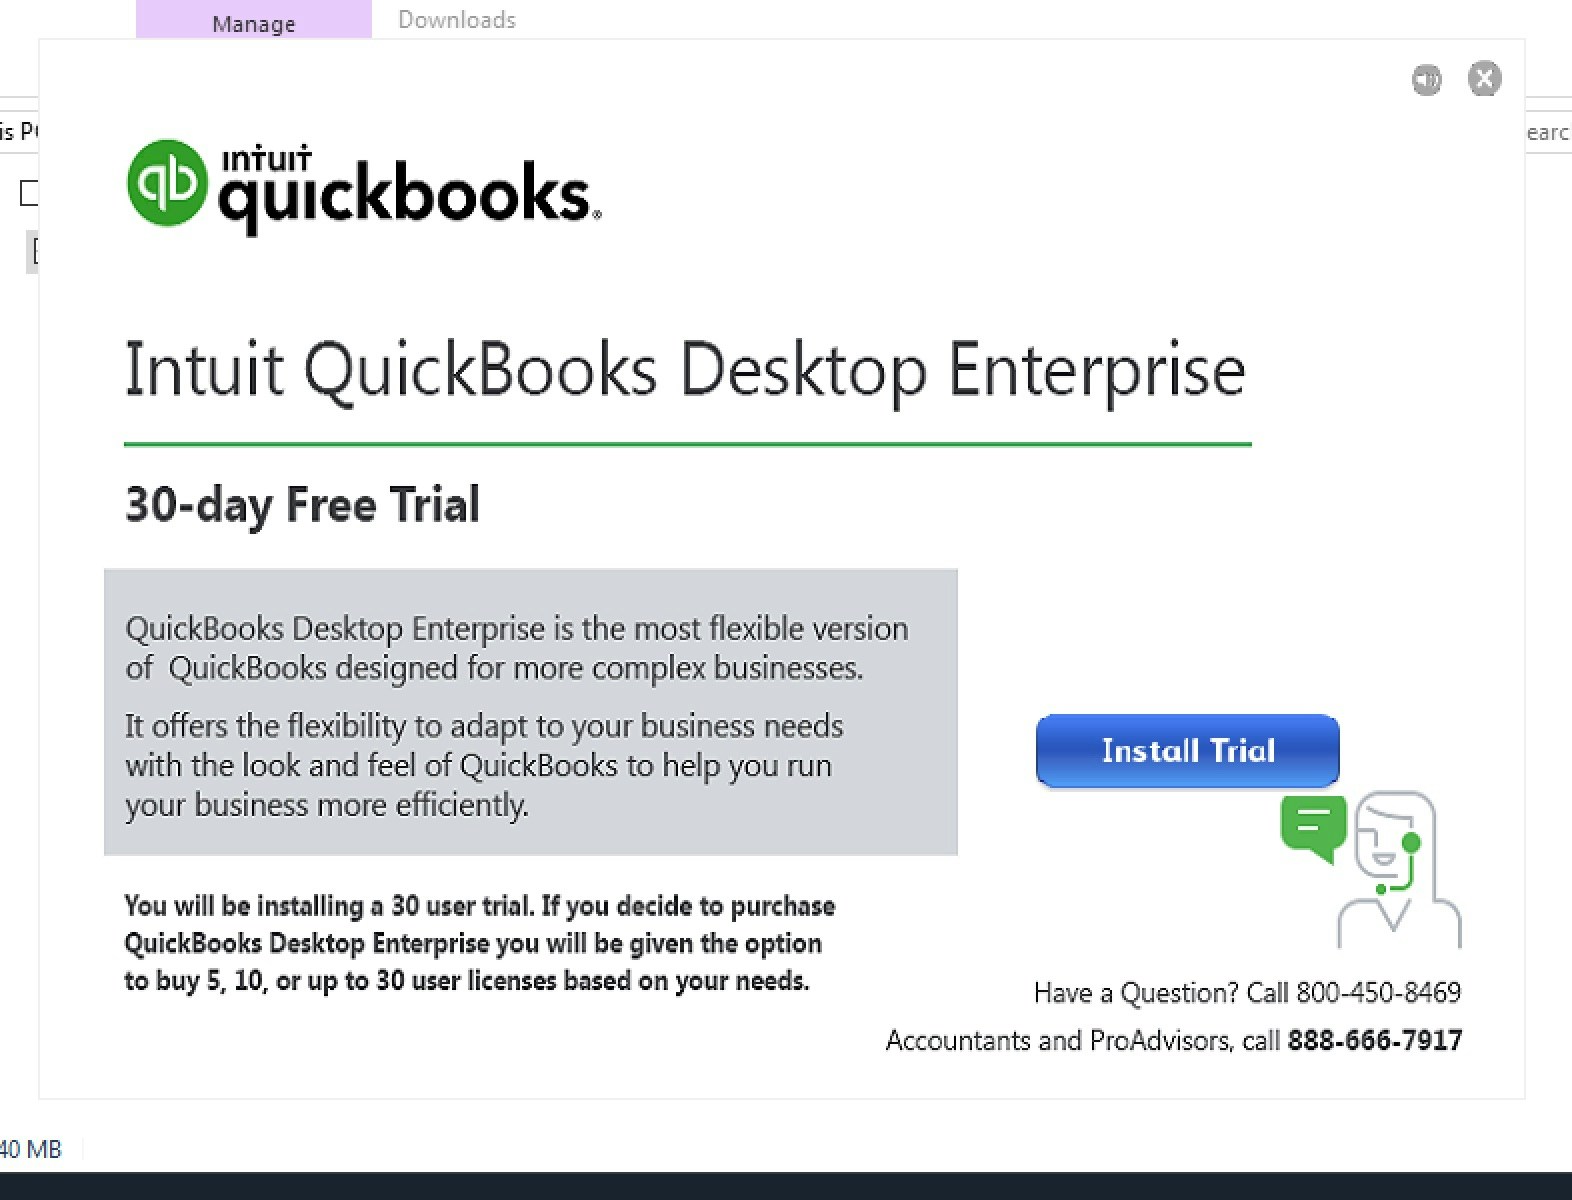
From the Windows instance, open Firefox and download the QuickBooks Desktop
Enterprise trial:
[https://quickbooks.intuit.com/learn-support/en-us/new-subscriptions/download-a-trial-of-quickbooks-desktop/00/185974](https://quickbooks.intuit.com/learn-support/en-us/new-subscriptions/download-a-trial-of-quickbooks-desktop/00/185974)
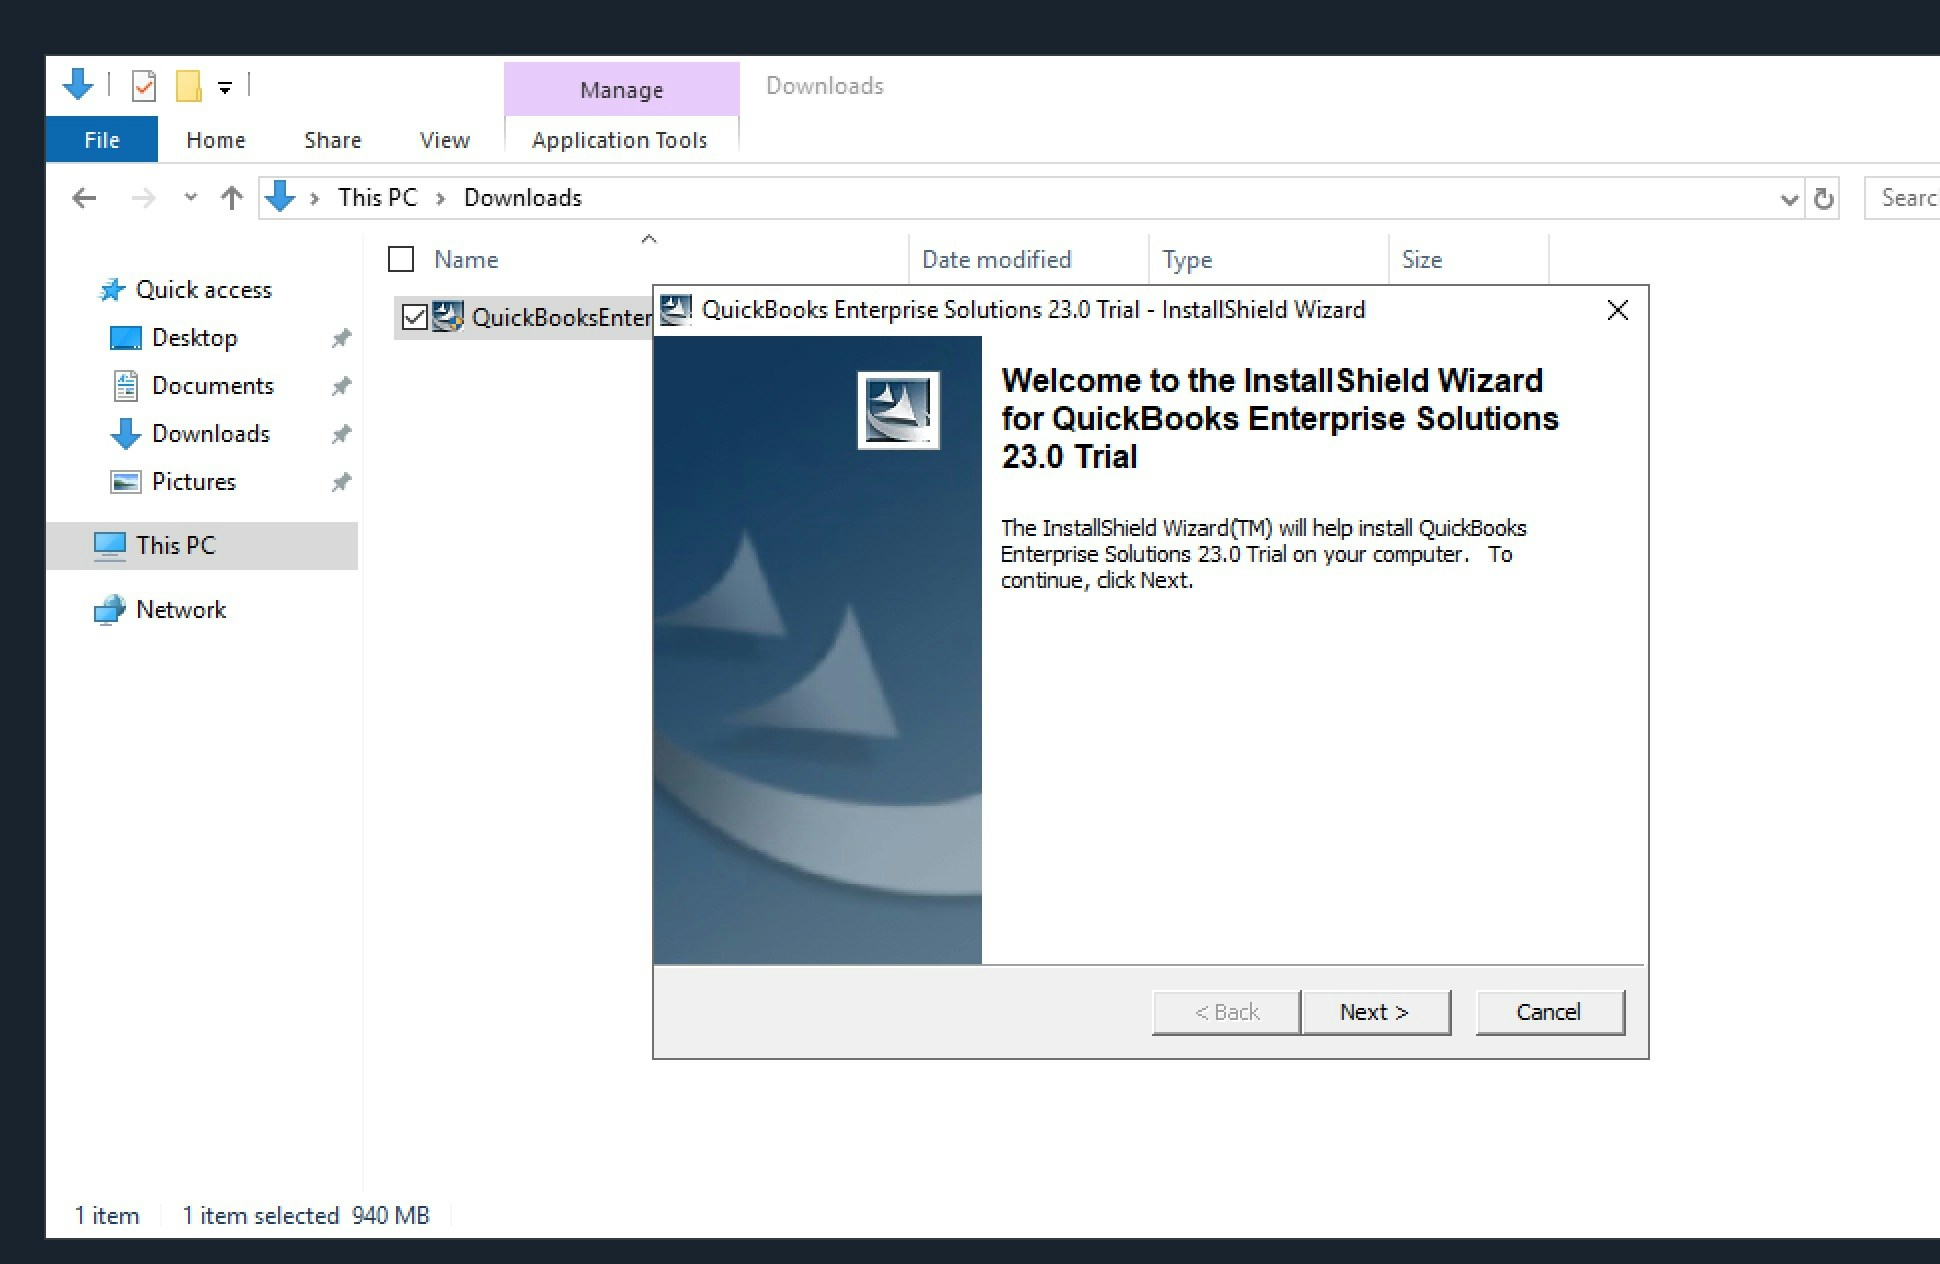
Navigate to the "Downloads" directory in the Windows File Explorer, and
launch the application named `QuickBooksEnterprise23Trial.exe`. Then, walk
through the installation.
## 3. Install QuickBooks Desktop
From the Windows instance, open Firefox and download the QuickBooks Desktop
Enterprise trial:
[https://quickbooks.intuit.com/learn-support/en-us/new-subscriptions/download-a-trial-of-quickbooks-desktop/00/185974](https://quickbooks.intuit.com/learn-support/en-us/new-subscriptions/download-a-trial-of-quickbooks-desktop/00/185974)
Navigate to the "Downloads" directory in the Windows File Explorer, and
launch the application named `QuickBooksEnterprise23Trial.exe`. Then, walk
through the installation.
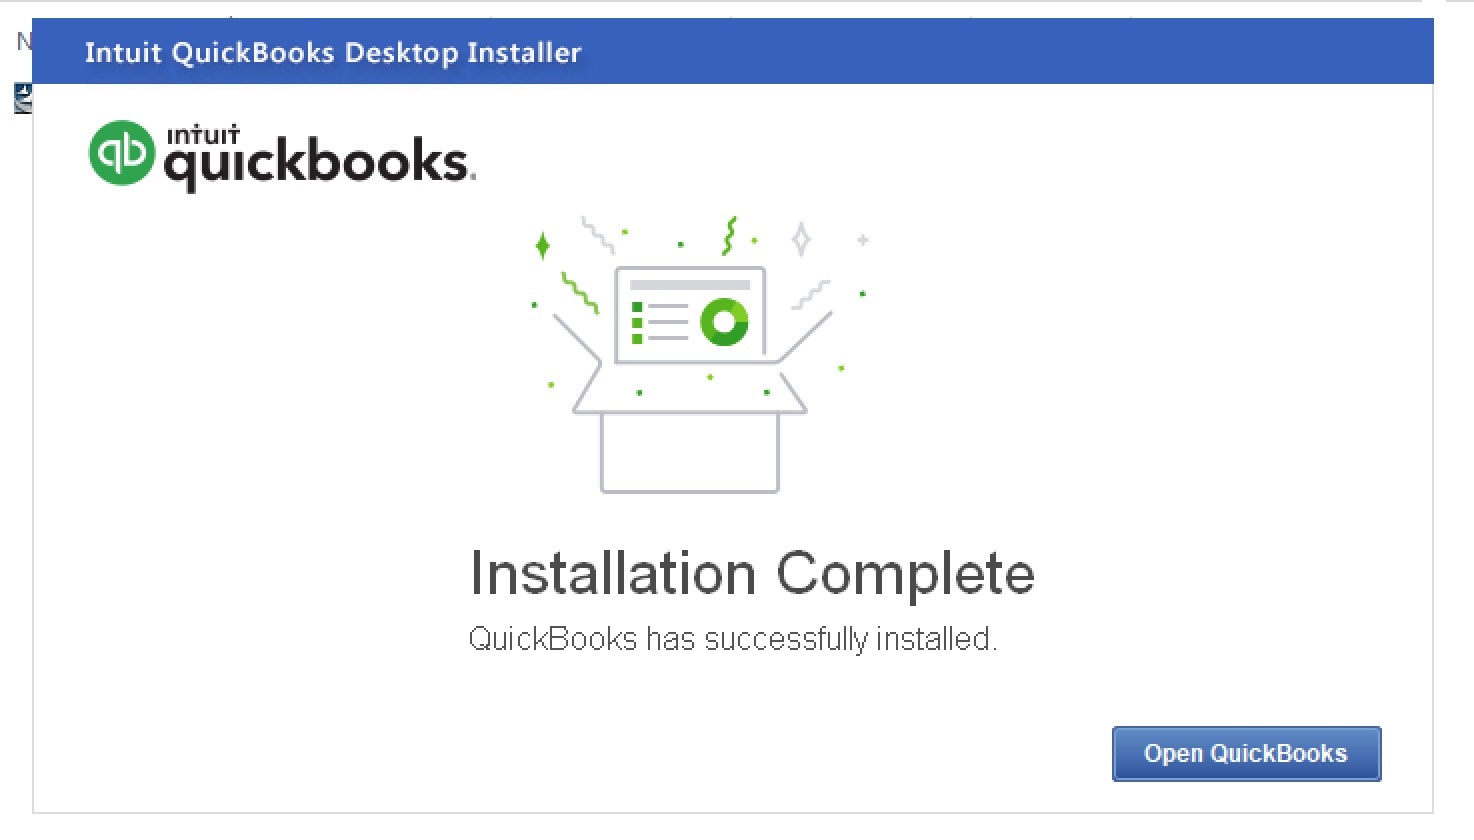
 After that installation finishes, another installer should launch
automatically. Walk through that installer, too. This can take 20-30 minutes
to finish.
After that installation finishes, another installer should launch
automatically. Walk through that installer, too. This can take 20-30 minutes
to finish.
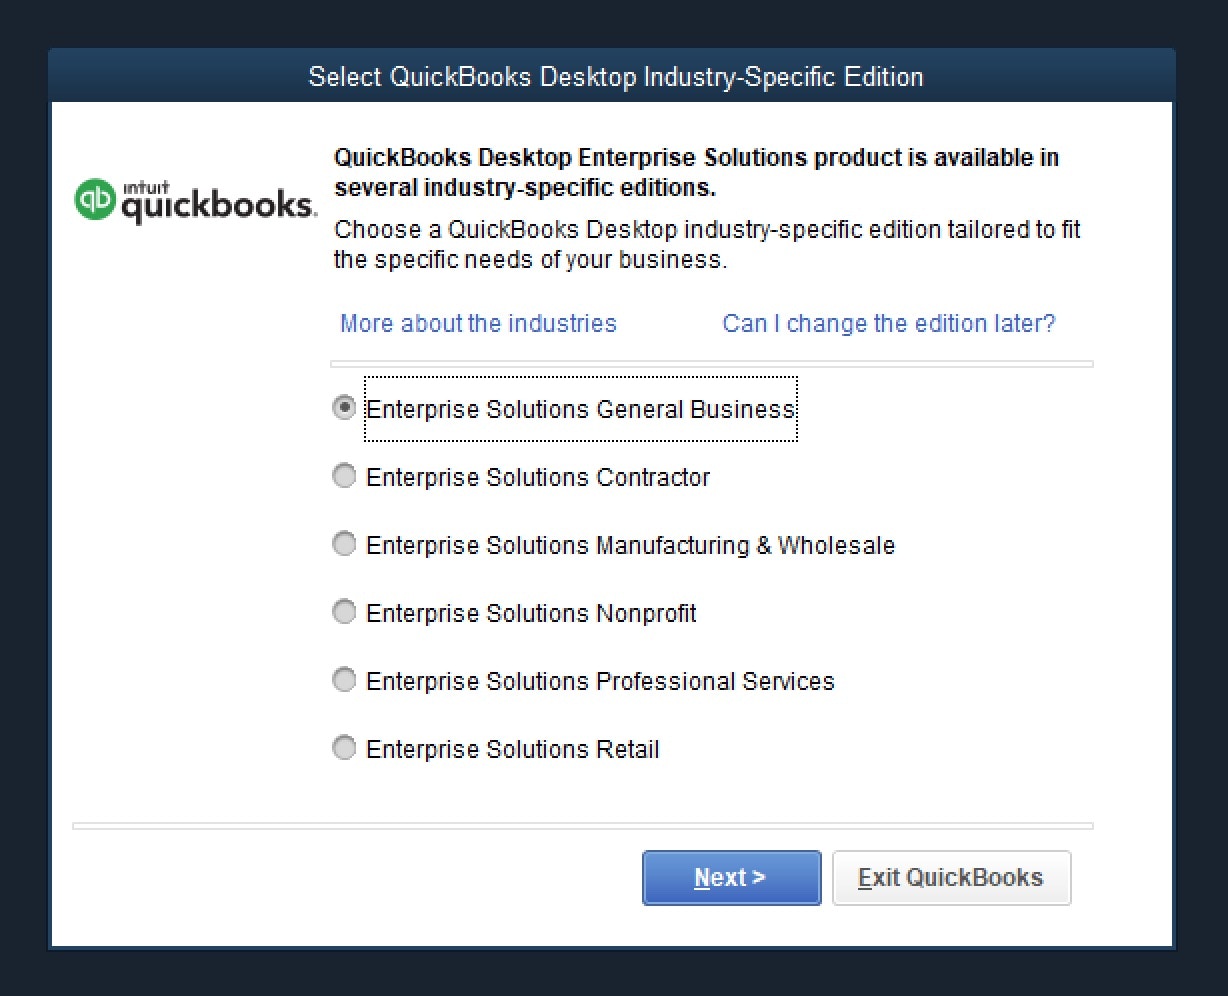
 Next, the following window will appear. Select the variant `QuickBooks
Desktop Enterprise General Business`:
Next, the following window will appear. Select the variant `QuickBooks
Desktop Enterprise General Business`:
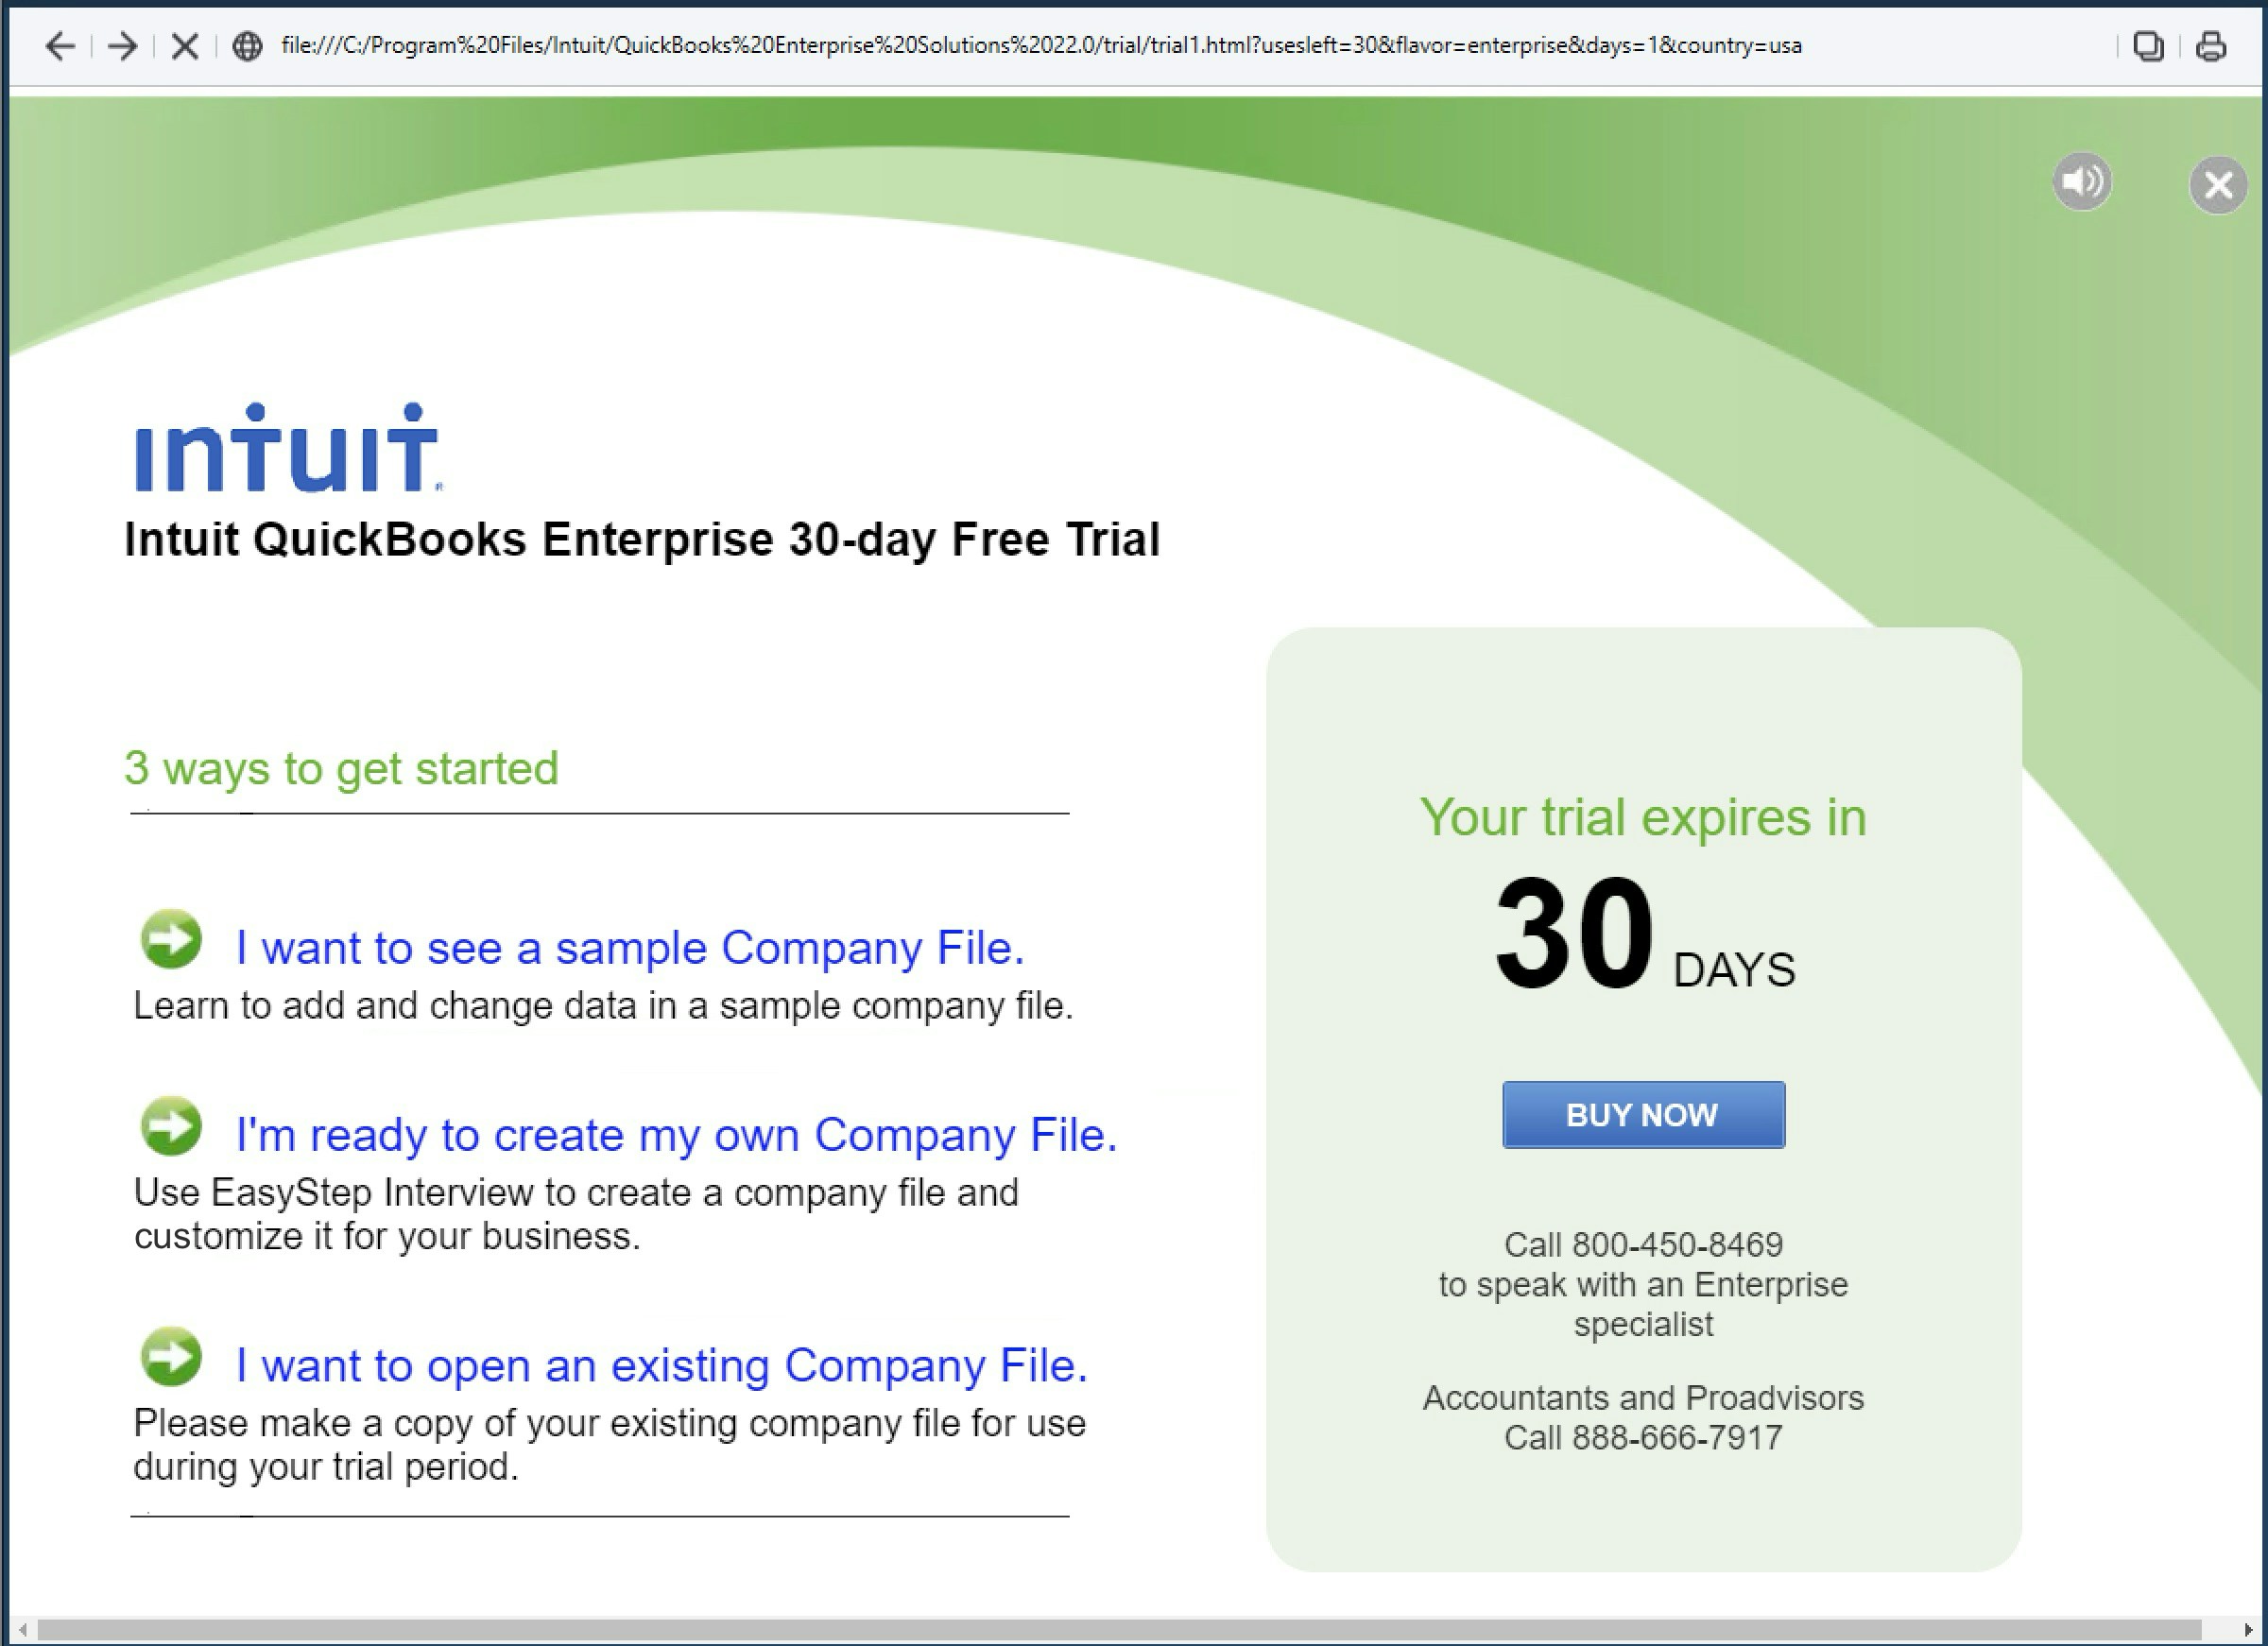
 Click "I want to see a Sample company file", which will provide a mock
dataset for you to use with QuickBooks Desktop. If this option does not
work, which sometimes happens, then click "I'm ready to create my own
company file" to create a new, empty company file.
Click "I want to see a Sample company file", which will provide a mock
dataset for you to use with QuickBooks Desktop. If this option does not
work, which sometimes happens, then click "I'm ready to create my own
company file" to create a new, empty company file.
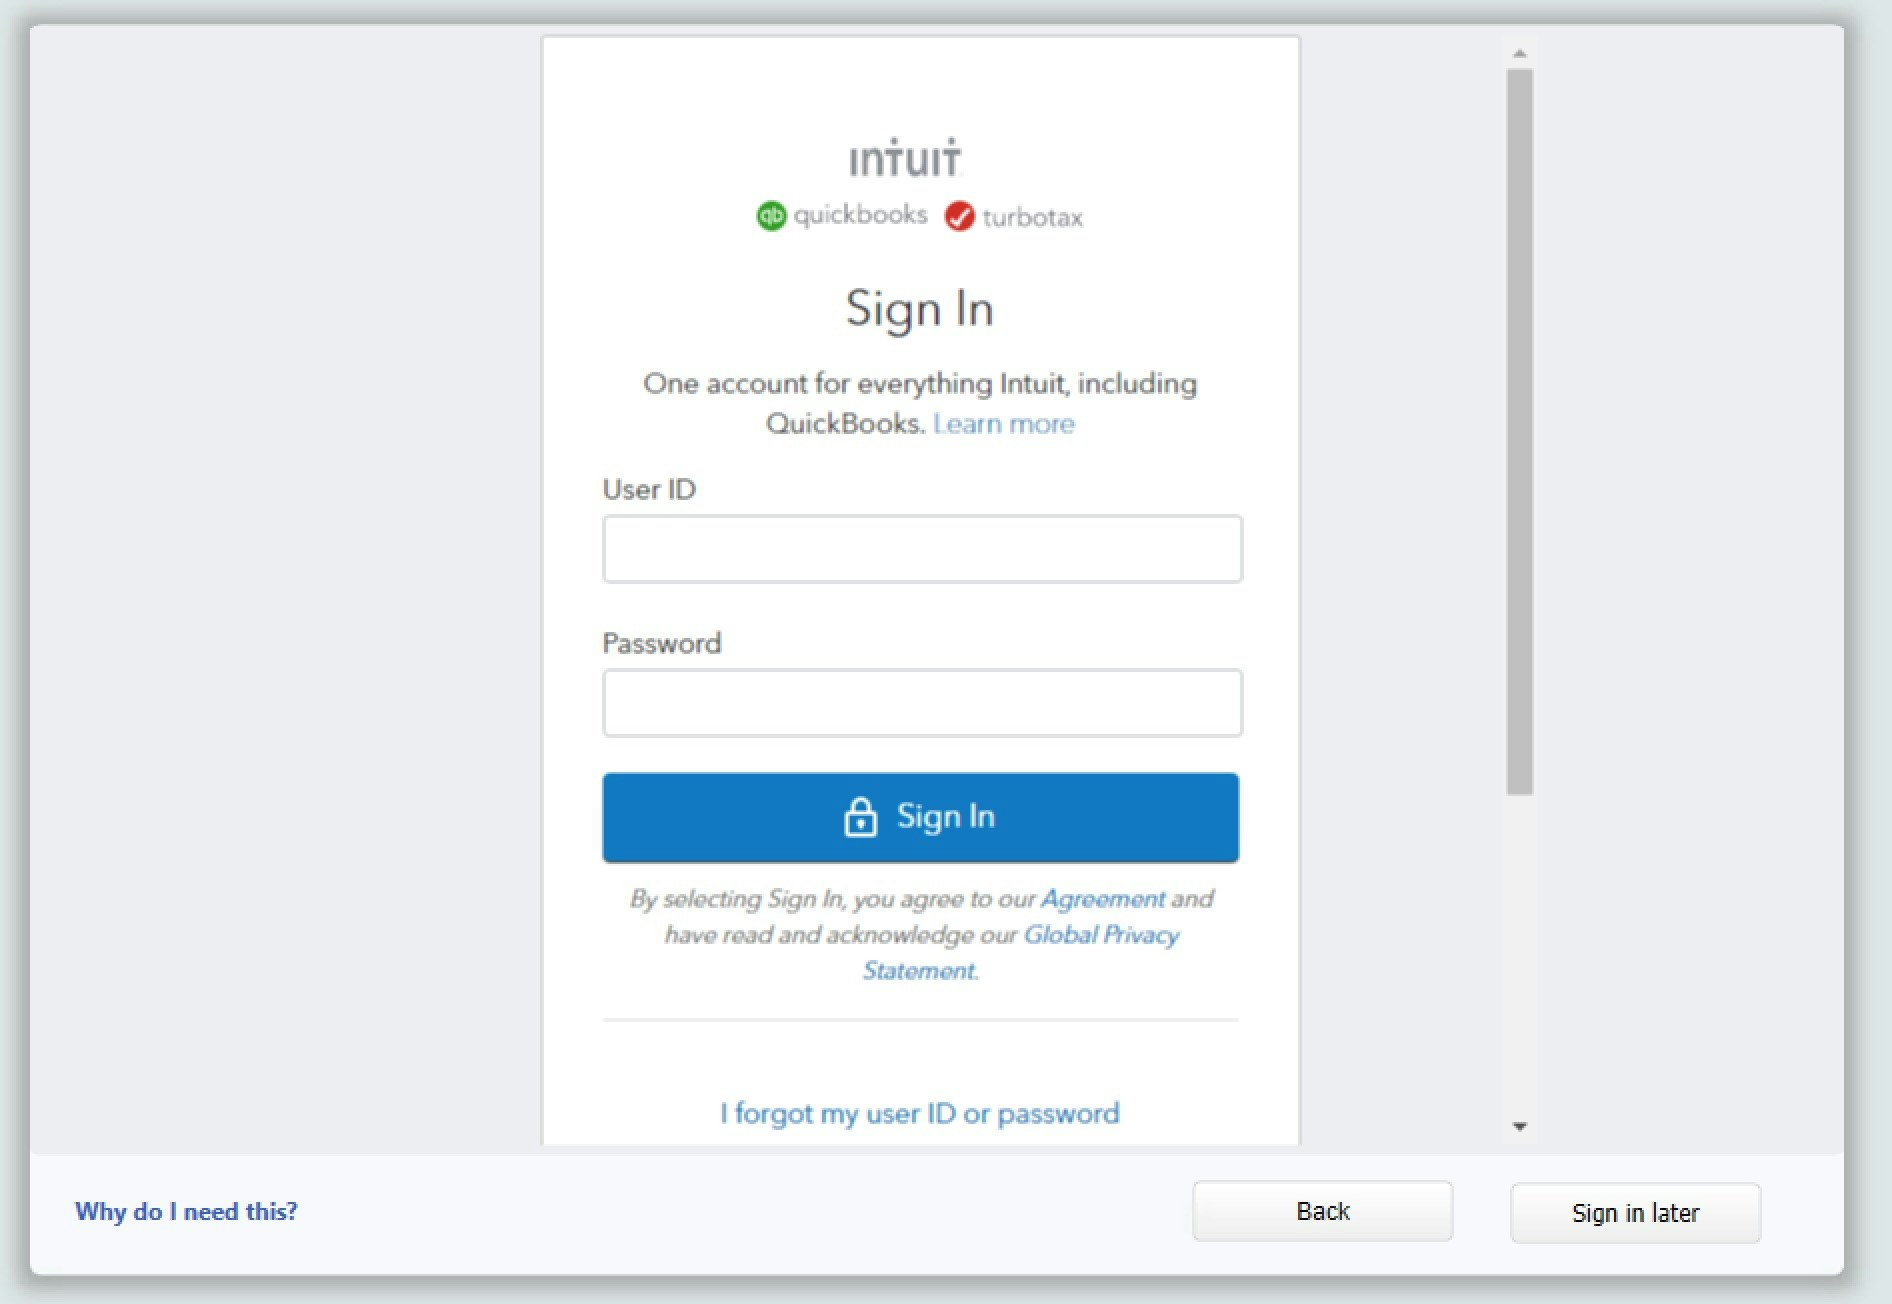
 If prompted, sign in to your Intuit developer account in QuickBooks Desktop.
If you do not have one, [you can create account
here](https://accounts.intuit.com/app/sign-in?start_screen_hint=SignUp).
If prompted, sign in to your Intuit developer account in QuickBooks Desktop.
If you do not have one, [you can create account
here](https://accounts.intuit.com/app/sign-in?start_screen_hint=SignUp).
 When you are done, you will see the QuickBooks Desktop interface:
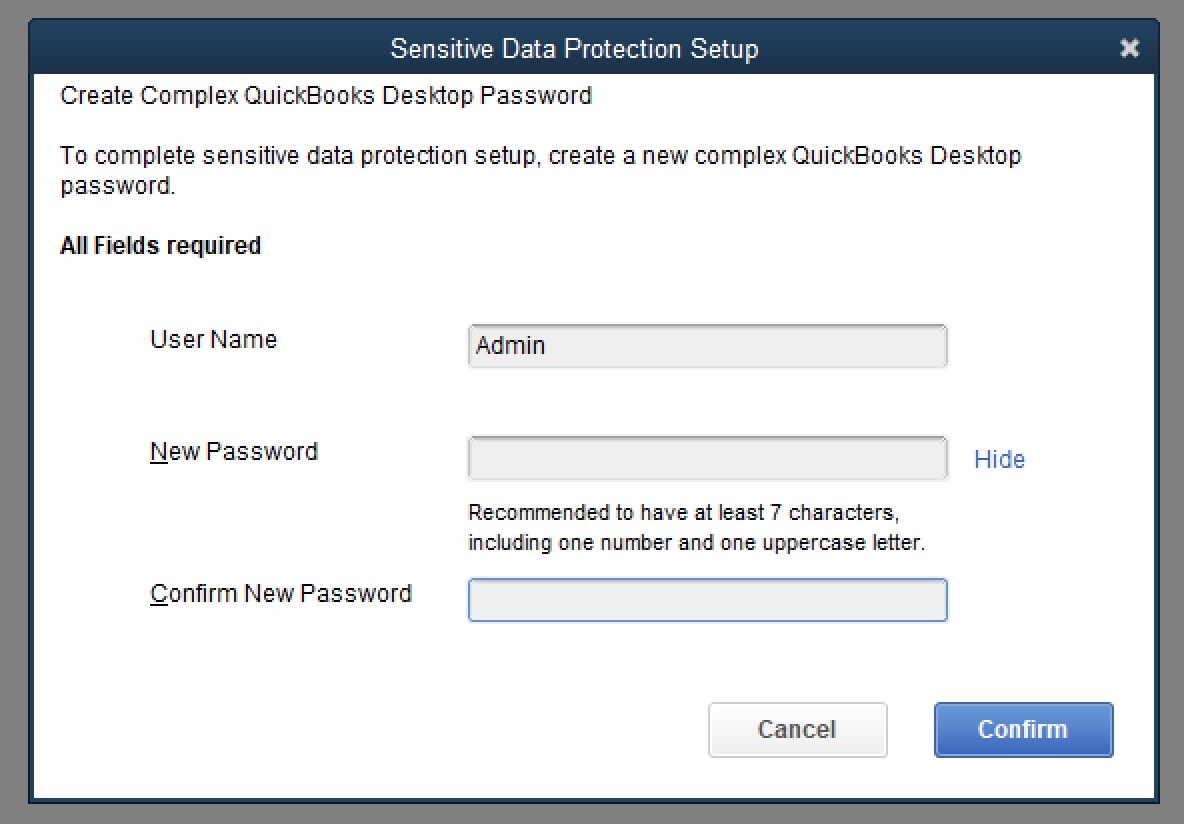
 At some point, QuickBooks Desktop might ask you to create a password.
Conductor will not ask for this password; it is internal to QuickBooks
Desktop.
At some point, QuickBooks Desktop might ask you to create a password.
Conductor will not ask for this password; it is internal to QuickBooks
Desktop.
 The trial installation will work for 30 days, after which you will need a
developer (NFR) license, which you can [get for free by following our
guide](/qbd/dev-license). After completing that guide, you can continue to
use the trial version while you wait for your NFR license to arrive.
## 4. Connect Conductor to your QuickBooks Desktop instance
Now that you have your own QuickBooks Desktop test instance, you can return to the [Quickstart](/quickstart) guide to connect it to Conductor. Don't worry; this part is much easier.
The trial installation will work for 30 days, after which you will need a
developer (NFR) license, which you can [get for free by following our
guide](/qbd/dev-license). After completing that guide, you can continue to
use the trial version while you wait for your NFR license to arrive.
## 4. Connect Conductor to your QuickBooks Desktop instance
Now that you have your own QuickBooks Desktop test instance, you can return to the [Quickstart](/quickstart) guide to connect it to Conductor. Don't worry; this part is much easier.